
Resident Evil 4 remake Chapter 15: Stronghold to Sanctuary
Resident Evil 4’s 15th chapter follows Leon as he continues his way to the summit after defeating Krauser at the end of Chapter 14.
The Our Resident Evil 4 remake Chapter 15 walkthrough will ensure you don’t miss any items from the beginning of the chapter through the Stasis, Bulwark Gate, Cliffside Ruins, Specimen Storage, Sanctuary Approach And SanctuaryPlease see the following: Luis’s Laboratory.
Get to the top
You don’t need to make any calls or send anything. So just get out there and smash those barrels! pesetas, gunpowderYou can also find out more about a velvet blue.
:format(webp):no_upscale()/cdn.vox-cdn.com/uploads/chorus_asset/file/24564813/Resident_Evil_4_Chapter_15_walkthrough_1.jpg)
Capcom via Polygon
Take the ramps up to a binocular spot and survey what’s coming up — spoiler: it’s a lot of bad guys.
For some, you can turn around and smash a crate at the top of the ramps. gunpowder. To get to the Merchant, take the north-facing ladder.
You won’t have anything special to sell this time, but we did just pick up that new Fighting Knife. It’s better than your default Combat Knife and it can also be repaired, so it’s safe to sell the Combat Knife to buy some tune ups for the Fighting Knife.
Use the typewriter for savings
A stronghold approach
When you’re done at the Merchant, head to the left and cross the wooden bridge.
:format(webp):no_upscale()/cdn.vox-cdn.com/uploads/chorus_asset/file/24564704/Chapter_15_1_2.png)
Sources: Capcom via Polygon| Sources: Capcom via Polygon
Make a right turn and pass immediately one of these barriers. They are perhaps called Jersey walls? You will avoid being shot. Thankfully, you don’t have to do the shooting this time.
:format(webp):no_upscale()/cdn.vox-cdn.com/uploads/chorus_asset/file/24564814/Resident_Evil_4_Chapter_15_walkthrough_2.jpg)
Capcom via Polygon
Make sure Mike doesn’t miss any soldiers with the helicopter attack and then move on. You’re going to get swarmed by more soldiers. Mike is circling to help you out — but you’ll have to make sure to get out of his way while he’s shooting. Watch for his spotlight as a clue to where he’ll strafe next.
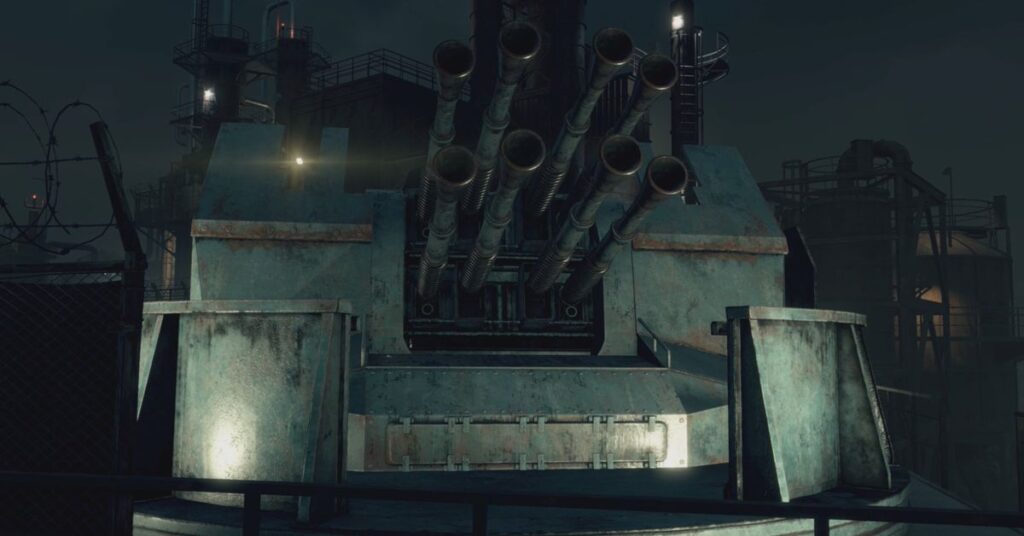
Continue moving in order to bring the soldiers into the open. It is best to avoid the gun emplacement at the top of the tower. It’s fun for a couple seconds, but you’ll get attacked from the side before you do much damage.
Mike will eventually blow up all the rubble that is keeping you here and then the fighting will stop. To the left is where you came in with a barrel. pesetas handgun ammoA crate is placed in front of the tower. pesetasAnd a boot knife. The tower has two crates. pesetas shotgun shells.
:format(webp):no_upscale()/cdn.vox-cdn.com/uploads/chorus_asset/file/24564815/Resident_Evil_4_Chapter_15_walkthrough_3.jpg)
Capcom via Polygon
To the right of the tower, turn around. There is a lantern on the back of that tower. Red beryl inside. To access two more crates, climb the ladder to your left. pesetas magnum ammo.
Make sure to check again for dropped drops, then continue northward through Mike’s gap.
Stasis
Follow the path around a couple turns, and take Mikes advice — get behind a barrier and wait for him to clear out most of the soldiers before you continue.
Watch out for the signs to the left just past the barrier. gunpowder on top of some Sandbags. Take the Grab The across the street from Mike, the just-destroyed tower. first aid spray.
Just past the explosive barrel, climb the ladder to the right. For a few barrels, take a right at the top. pesetas, gunpowder, magnum ammoPlease see the following: handgun ammoAlong with this, green herb.
:format(webp):no_upscale()/cdn.vox-cdn.com/uploads/chorus_asset/file/24564816/Resident_Evil_4_Chapter_15_walkthrough_4.jpg)
Capcom via Polygon
When you head back, watch for a lantern hanging from the metal beams above you — shoot it down for a velvet blue.
Dismantle the anti-aircraft guns
:format(webp):no_upscale()/cdn.vox-cdn.com/uploads/chorus_asset/file/24564708/Chapter_15_2.png)
Sources: Capcom via Polygon| Sources: Capcom via Polygon
Mike will be chased away by an anti-aircraft gun once you have crossed the metal bridge. Follow the trail down and take a left at the end. There’s a crate and a barrel at the first corner with Ammo for rifles, magnum ammoPlease see the following: pesetas.
You’ll have to head (most of the way) down the stairs to trigger the next wave of baddies, but head back up as soon as you do — fighting from the top of the stairs gets you a shot at a couple of exploding barrels and keeps you out of range of the gun emplacement.
First, deal with the soldiers walking on the ground. Next, turn your attention towards the machine gunner. You can either snipe the soldier on foot with the rifle ammunition, or use the barriers to cover your movements. You will see a pair arbalists to your left.
For a second, ignore the tunnel to the right and smash the barrel and crate right next to the staircase for more handgun ammo, submachine gun ammoPlease see the following: gunpowder.
Follow the path to the ladder. Continue left and go around the building until you reach the top. Grab the Yellow herbFollow the signs to the right and go inside. There’s a barrel to the left with pesetasTwo crates are to the right pesetas, gunpowder, Ressources (S).You can also find out more about a hand grenade.
You can unlock the door on the left and proceed through the opening doorway in front of you. You can climb the steel stairs and confront the soldiers.
:format(webp):no_upscale()/cdn.vox-cdn.com/uploads/chorus_asset/file/24564817/Resident_Evil_4_Chapter_15_walkthrough_6.jpg)
Capcom via Polygon
On the next flight, you will see two arbalists to your right. A rocket launcher soldier is on the tower in front of you. Continue climbing the staircase.
For maximum effect, smash both crates when you are on the roof. pesetas. Get the Ammo for riflesJust to the right, you can use the gun position to explode the anti-aircraft weapon to your left.
:format(webp):no_upscale()/cdn.vox-cdn.com/uploads/chorus_asset/file/24564819/Resident_Evil_4_Chapter_15_walkthrough_7.jpg)
Capcom via Polygon
It will explode and soldiers will be streaming out from the buildings across from you. Mike will continue to use the gun and help him clear them. As you head back downstairs, Mike will blow open the next gate for you — but he’ll also run out of ammo at that point.
After negotiating with soldiers, head towards the gate. As you cross the street, grab the gunpowder from one of the crates.
Bulwark Gate
:format(webp):no_upscale()/cdn.vox-cdn.com/uploads/chorus_asset/file/24564710/Chapter_15_3.png)
Sources: Capcom via Polygon| Sources: Capcom via Polygon
You will find two gun emplacements as soon as the gate is opened. It’s a pity.). These can be avoided by quickly cutting to the right and going for the tunnel. Grab the green herb At the end, climb the ladder.
:format(webp):no_upscale()/cdn.vox-cdn.com/uploads/chorus_asset/file/24564821/Resident_Evil_4_Chapter_15_walkthrough_9.jpg)
Capcom via Polygon
A few soldiers will probably follow you into the tunnel — if you have a grenade to deal with them, toss that, but they’re easier to deal with at the top of the ladder.
Grab the highest rung of the ladder Ammo for rifles You can then turn your back to confront your pursuers. If you’re careful, you can snipe the gun operator across from you.
You can sprint across the catwalk and to the other side of the open space, taking the first right to a small area with a barrel. shotgun shells, handgun ammoPlease see the following: pesetas. You can also use this spot to see the gun emplacement or arbalist across from you, if you have enough ammo.
To find the barrel, turn left and follow the road around to get back outside. hAndgun ammo and Ressources (L).. Around front, use the gun to deal with the soldiers across from you if you haven’t already. This should end the fighting between the soldiers.
:format(webp):no_upscale()/cdn.vox-cdn.com/uploads/chorus_asset/file/24564823/Resident_Evil_4_Chapter_15_walkthrough_11.jpg)
Capcom via Polygon
Go straight to the other end of the walkway. Throw the switch there, and then sprint back to the gun — a handful of soldiers will appear opposite you, but you can make short work of them with it. Be very careful with the ammo. (You’ll see why in a second.)
Take the Tower, located just left of the Gun and drop it. submachine gun ammoYou can find the crate. Another wave of enemies will show up on the far side — this time including a boar-headed brute. You can climb up and take out as much ammunition as possible to defeat as many enemies as you can.
Head east and drop off the tower. To get a weapon, smash the barrel beneath the other gun emplacement. HandgrenadeSome shotgun shellsPlease see the following: pesetas. Grab the Red herbYou can climb up the ladder.
To find more, take the first left. Run around the back of the building. shotgun shellsSurround yourself with sandbags and place them on top. Turn around to the front and look inside for two crates. pesetas gunpowder.
Take a right and exit. There’s another switch at the far end of the walkway. After the gate is opened, you can backtrack and drop down to pass it.
Cliffside Ruins
:format(webp):no_upscale()/cdn.vox-cdn.com/uploads/chorus_asset/file/24564711/Chapter_15_4.png)
Sources: Capcom via Polygon| Sources: Capcom via Polygon
Follow the staircase all the way. Mike will come back to you when you get to the Cliffside Ruins. I’m sure everything will go great. Continue forward, until you see a scene in which nothing goes as planned.
:format(webp):no_upscale()/cdn.vox-cdn.com/uploads/chorus_asset/file/24564824/Resident_Evil_4_Chapter_15_walkthrough_14.jpg)
Once you have control back, take care of the four novistadores. Run to the right side of the tower (the one with the scaffolding) before you do anything else. Look through the window and face southwest. You’ll see Blue Medallion 1 from 5 Hanging at the rear of the tower
:format(webp):no_upscale()/cdn.vox-cdn.com/uploads/chorus_asset/file/24564828/Resident_Evil_4_Chapter_15_walkthrough_17.jpg)
Go up the ladder and into the tower. Continue following the trail until you see the ocean. Continue following the path until you can see the ocean. Blue Medallion 2 from 5. Continue to the left, then turn right. The headstone can be consulted. Cliffside Epitaph file. To access the files, you can open the chest at the left. Royalty Staff.
:format(webp):no_upscale()/cdn.vox-cdn.com/uploads/chorus_asset/file/24564825/Resident_Evil_4_Chapter_15_walkthrough_15.jpg)
Turn left and go back up to the top. The two crates should be smashed. Ressources (S). handgun ammo. After you’ve passed the crumbling wall look straight to see! Blue Medallion 3, of 5. Continue to climb the ladder by turning left. Turn right and smash the barrels at the top. handgun ammo pesetas. For more, drop down to smash the barrel left. pesetas.
:format(webp):no_upscale()/cdn.vox-cdn.com/uploads/chorus_asset/file/24564827/Resident_Evil_4_Chapter_15_walkthrough_16.jpg)
Keep following the trail and keep an eye on your left. Blue Medallion #4 of 5 Hanging from the scaffolding
:format(webp):no_upscale()/cdn.vox-cdn.com/uploads/chorus_asset/file/24564830/Resident_Evil_4_Chapter_15_walkthrough_19.jpg)
Keep there, and then turn right to the building immediately southwest. You will see the steeple (? You can spot the steeple(?). Blue Medallion 5, of 5.
To the right of the entrance is the Deceive the Blue Medallions 6 Blue Note Request if we hadn’t just finished it.
:format(webp):no_upscale()/cdn.vox-cdn.com/uploads/chorus_asset/file/24564714/Chapter_15_5.png)
Capcom via Polygon
You will need to push through the doors. There are three bags of body material hanging from the corners.
:format(webp):no_upscale()/cdn.vox-cdn.com/uploads/chorus_asset/file/24564833/Resident_Evil_4_Chapter_15_walkthrough_18.jpg)
Capcom via Polygon
When you try to push past, a regenerador will drop out — thankfully not an iron maiden, and this one only has two parasites. Take it on, then smash the barrel at the corner to get some pesetas.
Take the item you need when you enter the next room. Transfer of biological specimens You can now file at the table. Take the document from the table’s back corner. Ressources (L). From the filing cabinet. You will find the chest in your right hand. Beautiful Bangle.
:format(webp):no_upscale()/cdn.vox-cdn.com/uploads/chorus_asset/file/24564835/Resident_Evil_4_Chapter_15_walkthrough_22.jpg)
Look up, looking to your right, and turn to the side. Clockwork Castellan 15 of 16It is located in the rafters just above you.
Return to the first room and use the wheel (temporarily opening the gate) You can now proceed.
Specimen Storage
For some, smash the barrel in front of you pesetasContinue to follow the corridor forward. Break the next container to get some handgun ammoAnother regenerador will be found in the bag. It has three parasites And is an iron maiden — once you pop the torso parasites, the final one is in its head.
Follow the corridor around by taking a left. To make a good smashed, smash the two crates that are by the gurney. viper You can also find out more about a Handgrenade. Another end of the Gurney is a Handgrenade.
:format(webp):no_upscale()/cdn.vox-cdn.com/uploads/chorus_asset/file/24564840/Resident_Evil_4_Chapter_15_walkthrough_21.jpg)
Capcom via Polygon
Follow the path around the room and get into the central cage. Break the crates. pesetas Ressources (L).. A second iron maiden regenerationador, this time not earlier in the game (two head parasites in each torso), will appear in the body bag at the center of the room.
You can use the wheel at the corner northwest of the cage. Temporarily this opens the gate to the northwest at the top. To get to the top, sprint around.
To the right are two crates gunpowder, but nothing else in here or in the Merchant’s room.
Merchant
When you talk to the Merchant, you’ll cash in the Blue Medallion Request for five spinels — this was the final Blue Note Request, so you’ll also earn the Jack of All Trades Award or trophy
Then, sell it Royalty StaffThe Beautiful BangleThe 9,000 pesetas price can be increased by inlaying the appropriate gemstones. There’s nothing new, so just do your repairs and tuning up.
To the fifth floor (and last) you can use the elevator located behind the Merchant. Shooting Range. There aren’t any new challenges here, though — it’s just another opportunity to earn Charms.
Sanctuary Approach
:format(webp):no_upscale()/cdn.vox-cdn.com/uploads/chorus_asset/file/24564718/Chapter_15_6.png)
Sources: Capcom via Polygon| Sources: Capcom via Polygon
Head through the door on the south side of the Merchant’s room. Watch out for the two annoying and sneaky arbalists by moving to the right.
:format(webp):no_upscale()/cdn.vox-cdn.com/uploads/chorus_asset/file/24564850/Resident_Evil_4_Chapter_15_walkthrough_27.jpg)
Capcom via Polygon
Keep to the left. There’s a camouflaged novistador by the barrel there. For more, smash the barrel. gunpowderTurn right and go to the other side.
Carefully make your way up the hill — there are three mines, two bear traps, and a handful of novistadors along the way. Take out the man ahead of you with a rocket launcher and use the pillars to provide cover.
Turn left, then go back in the room. Grab the black bassLeon: Stop eating random, cold seafood. Smash the barrels! magnum And submachine gun ammoPick up the theYellow herb.
:format(webp):no_upscale()/cdn.vox-cdn.com/uploads/chorus_asset/file/24564844/Resident_Evil_4_Chapter_15_walkthrough_25.jpg)
Capcom via Polygon
Take a step out on to the walkway at the east end of the room, and then climb up the ladder. Then, cross the bridge over the roof to smash the crates. handgun ammoYou can find out more at http://www.amazon.com/?p=238. heavy grenadePlease see the following: Ressources (S).. Grab the at the southeast corner Ammo for riflesFrom the low wall.
:format(webp):no_upscale()/cdn.vox-cdn.com/uploads/chorus_asset/file/24564847/Resident_Evil_4_Chapter_15_walkthrough_26.jpg)
Capcom via Polygon
Be sure to move as far west as you can before you start falling. To see an explosive barrel, look through the window to your south. To save your life, shoot it in less than a second.
Keep going up the hill and drop down. You will see doors at each end of the path as you go around the bend. If you are close enough to them, they will begin to pile up (less on the left because we have just shot a barrel).
:format(webp):no_upscale()/cdn.vox-cdn.com/uploads/chorus_asset/file/24564853/Resident_Evil_4_Chapter_15_walkthrough_28.jpg)
Capcom via Polygon
Once they’re dealt with, head into the building on the right (north). For some, you can smash the crates in front of you. hAndgun ammo and shotgun shells. For a pair, head right Ressources (L). And gunpowder. Go upstairs.
Deal with the novistadors on the roof. Then, head towards the right to enter the room. Grab the Ammo for riflesSmash the barrel from the corner of the wall. hAndgun ammo and gunpowderPick up the Red herb.
:format(webp):no_upscale()/cdn.vox-cdn.com/uploads/chorus_asset/file/24564855/Resident_Evil_4_Chapter_15_walkthrough_29.jpg)
Capcom via Polygon
Returning outside, cross over the bridge and go into the opposite building. Continue to loop around the second set of doors by going past the staircase. You will see a boar-headed brute with a few soldiers, as well as a few others coming up the stairs.
When they’re all dealt with, push through the doors and cross into the next building. There, you can redirect the autoturret. For some, head to the right gunpowderenter the cabinets, backtrack and go down the stairs.
You can smash the crate located at the base of the stairs to get some gunpowderNext, you will need to smash the two crates that are under the staircase. submachine gun ammo, Ressources (S).Please see the following: handgun ammo. More information is available in the East Wall Locker. gunpowder.
Go through the front door, and then turn left. Ignore the auto-turret on your right as you pass — it was a different way to deal with the soldiers we already killed. You can enter the Sanctuary by pushing through the blue doors.
Sanctuary // Go after Ashley // Head for Luis’ Laboratory
There’s nothing to grab inside (there are some markers with names on them along the walls, but they’re not files), so just run forward toward Ashley. You’ll trigger a cutscene as you reach the altar.
Once Ada rescues Leon, continue walking along the only road you have and pushing through visions to reach the laboratory and make it work. Luis’ Key It is possible to unlock it.
To trigger another chapter-ending cutscene, walk forward and place Ashley in the chair.
We’ll get Leon his treatment and finish out the game in Chapter 16. Return to full functionality. Resident Evil 4Here’s a walkthrough of the remake.
#Resident #Evil #remake #Chapter #Stronghold #Sanctuary


