
How to get the Time Armor set in Zelda Tears of the Kingdom
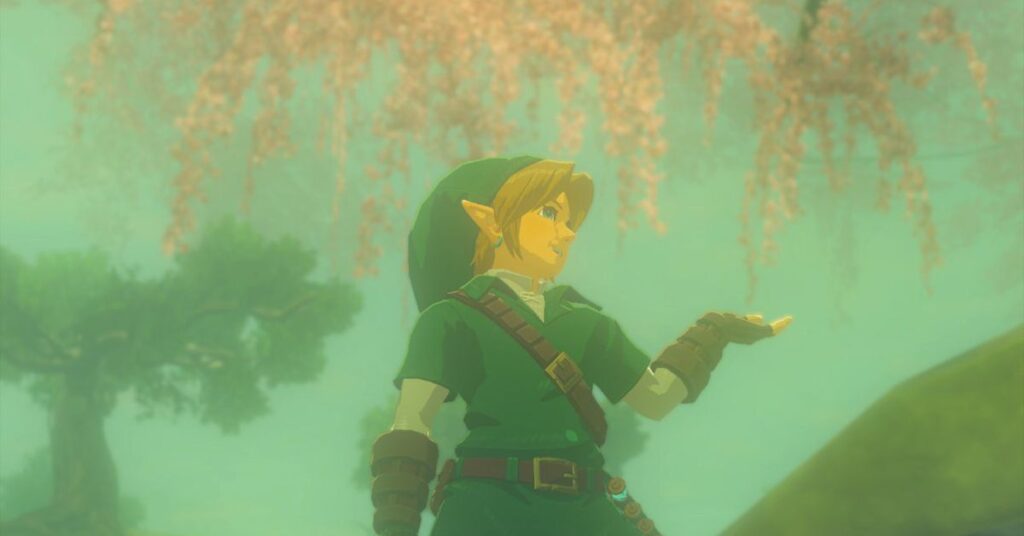
You can also find out more about the following: Time ArmorThe following are some examples of how to use Tears of the Kingdom – The Legend of ZeldaThis is a beautiful throwback. The pieces of this armor don’t have a unique ability, but they pay homage to Link’s outfit in Zelda Ocarina of Time. You can get the set via the Ocarina amiibo, but if you don’t have it, don’t fret, as you can get the whole set without it.
It’s likely that you’ll receive hints on where to find the Time Armor from NPCs or old maps scattered across Hyrule. Similar to the Frostbite Armor, though, if you want to skip the additional steps and get straight to the treasure, this guide explains how to do so quickly — detailing the spots for the Tunic of time, The Time TrousersThen, Cap of Time.
Time Armor chest piece location
:format(webp):no_upscale()/cdn.vox-cdn.com/uploads/chorus_asset/file/24664684/Zelda_Tears_of_the_Kingdom_Time_Armor_set_locations_6.jpg)
Image: Nintendo EPD/Nintendo via Polygon
The newest version of the Tunic of timeIn the Depths You can get to the location by heading to Hyrule Chasm, which is located at these coordinates. (-2633, 1132, 0176)You can find it northwest of Hyrule Ridge. You can use Lindor’s Brow Skyview TowerGet there
:format(webp):no_upscale()/cdn.vox-cdn.com/uploads/chorus_asset/file/24664685/Zelda_Tears_of_the_Kingdom_Time_Armor_set_locations_7.jpg)
Image: Nintendo EPD/Nintendo via Polygon
1. Once down below, you’ll spot the Tikanur LightrootThe coordinates are northeast from where you currently stand (-2529, 1170, -0623). Then, you’ll need to move east.
:format(webp):no_upscale()/cdn.vox-cdn.com/uploads/chorus_asset/file/24664694/Zelda_Tears_of_the_Kingdom_Time_Armor_set_locations_8.jpg)
Image: Nintendo EPD/Nintendo via Polygon
2. Thankfully, it’s a fairly simple trip. As long as you’re keeping your gloom resistance in check, all you need to do is continue moving east until you set foot in the Lindor Canyon Mine.
:format(webp):no_upscale()/cdn.vox-cdn.com/uploads/chorus_asset/file/24664698/2023051718082800_s.jpg)
Image: Nintendo EPD/Nintendo via Polygon
3. A staircase leads up to the treasure. It is hidden by an open structure.
:format(webp):no_upscale()/cdn.vox-cdn.com/uploads/chorus_asset/file/24664699/2023051718084600_s.jpg)
Image: Nintendo EPD/Nintendo via Polygon
4. The chest will open at these coordinates (-2003, 1310, -0715)Grab the grab Tunic of timeThis is an armored piece that has 3 defense.
:format(webp):no_upscale()/cdn.vox-cdn.com/uploads/chorus_asset/file/24664703/Zelda_Tears_of_the_Kingdom_Time_Armor_set_locations_15.jpg)
Image: Nintendo EPD/Nintendo via Polygon
In case you’re lost, you can find a screenshot of the map location above. That’s all for this piece.
Time Armor legs piece location
:format(webp):no_upscale()/cdn.vox-cdn.com/uploads/chorus_asset/file/24664662/Zelda_Tears_of_the_Kingdom_Time_Armor_set_locations_2.jpg)
Image: Nintendo EPD/Nintendo via Polygon
The newest version of the Trousers Of TimeIn the Depths If you want to get closer to this spot, head over to Gerudo Summit Chasm (coordinates). (-4204, -0654, 0682)The Gerudo Highlands is located to the northwest. The You can use Gerudo Highlands Skyview TowerIt’s not too late to reach your destination.
:format(webp):no_upscale()/cdn.vox-cdn.com/uploads/chorus_asset/file/24664664/Zelda_Tears_of_the_Kingdom_Time_Armor_set_locations_3.jpg)
Image: Nintendo EPD/Nintendo via Polygon
1. After landing, using the map for reference and the Location is to the southeast of chasm. If you use a few brightbloom seeds to light around, or the ever-helpful Miner’s Armor set, you’ll notice some empty ruins.
:format(webp):no_upscale()/cdn.vox-cdn.com/uploads/chorus_asset/file/24664666/Zelda_Tears_of_the_Kingdom_Time_Armor_set_locations_4.jpg)
Image: Nintendo EPD/Nintendo via Polygon
2. Move toward the center of the ruins themselves, and you’ll find the chest at the coordinates (-4181, -0702, -1121)A staircase leads up to an open, uncovered structure.
:format(webp):no_upscale()/cdn.vox-cdn.com/uploads/chorus_asset/file/24664668/Zelda_Tears_of_the_Kingdom_Time_Armor_set_locations_5.jpg)
Image: Nintendo EPD/Nintendo via Polygon
You will receive the following when you open the chest Trousers Of TimeThis is an armor with 3 defense.
Location of Time Armor’s headpiece
Image: Nintendo EPD/Nintendo via Polygon
The newest version of the Cap of TimeIn the Depths You can get to the location by heading to Hyrule Chasm, which is located at these coordinates. (-2633, 1132, 0176)You can find it northwest of Hyrule Ridge. You can use Lindor’s Brow Skyview TowerGet there
Image: Nintendo EPD/Nintendo via Polygon
1. When you land, using the map to guide you, it is recommended that the Tikanur LightrootThe coordinates of the icon located to the northeast of the chasm are: (-2529, 1170, -0623).
:format(webp):no_upscale()/cdn.vox-cdn.com/uploads/chorus_asset/file/24664691/Zelda_Tears_of_the_Kingdom_Time_Armor_set_locations_8.jpg)
Image: Nintendo EPD/Nintendo via Polygon
2. Prepare yourself for a lengthy journey to reach the chest. To kick things off, head southeast of the Tikanur Lightroot, where you’ll notice a long wall that leads to an enemy camp.
:format(webp):no_upscale()/cdn.vox-cdn.com/uploads/chorus_asset/file/24664721/Zelda_Tears_of_the_Kingdom_Time_Armor_set_locations_16.jpg)
Image: Nintendo EPD/Nintendo via Polygon
3. The trick here is that there’s a long root that starts at the coordinates (-2426, 1017, -0546)It is an excellent way up to the North.
:format(webp):no_upscale()/cdn.vox-cdn.com/uploads/chorus_asset/file/24664723/Zelda_Tears_of_the_Kingdom_Time_Armor_set_locations_17.jpg)
Image: Nintendo EPD/Nintendo via Polygon
4. You’ll eventually stumble upon a peak that hits the literal ceiling of the Depths. If you pay attention to the map, the branch cuts itself, which means you’re going to have to glide to the other end.
:format(webp):no_upscale()/cdn.vox-cdn.com/uploads/chorus_asset/file/24664726/Zelda_Tears_of_the_Kingdom_Time_Armor_set_locations_18.jpg)
Image: Nintendo EPD/Nintendo via Polygon
5. As you climb, keep looking for surfaces that Link could stand on. As you’re doing this, slowly start turning to the right, using the map as a reference, until the second half of the tree branch is visible.
:format(webp):no_upscale()/cdn.vox-cdn.com/uploads/chorus_asset/file/24664728/Zelda_Tears_of_the_Kingdom_Time_Armor_set_locations_19.jpg)
Image: Nintendo EPD/Nintendo via Polygon
6. Once you reach the required altitude, drop from the branch. Paragliding, fly to the opposite end.
:format(webp):no_upscale()/cdn.vox-cdn.com/uploads/chorus_asset/file/24664729/Zelda_Tears_of_the_Kingdom_Time_Armor_set_locations_20.jpg)
Image: Nintendo EPD/Nintendo via Polygon
7. Use the second half of that branch to move north. You’re going to spot a smaller branch to your right shortly after. This will get you to the other side of the wall.
:format(webp):no_upscale()/cdn.vox-cdn.com/uploads/chorus_asset/file/24664735/Zelda_Tears_of_the_Kingdom_Time_Armor_set_locations_21.jpg)
Image: Nintendo EPD/Nintendo via Polygon
8. Then, continue moving northwest until you come to a cliff. If you look down below, you’ll be able to spot the Kawumoro LightrootIn the distance
:format(webp):no_upscale()/cdn.vox-cdn.com/uploads/chorus_asset/file/24664737/Zelda_Tears_of_the_Kingdom_Time_Armor_set_locations_22.jpg)
Image: Nintendo EPD/Nintendo via Polygon
9. The coordinates of the lightroot are: (-3063, 1620, -0687)It should be the second place you visit.
:format(webp):no_upscale()/cdn.vox-cdn.com/uploads/chorus_asset/file/24664738/Zelda_Tears_of_the_Kingdom_Time_Armor_set_locations_23.jpg)
Image: Nintendo EPD/Nintendo via Polygon
10. Let’s keep moving. To get to the second lightroot, it’s a little easier. From Kawumoro, keep moving northwest — you’re going to start seeing statues, which serve as perfect beacons to stay in the right direction.
:format(webp):no_upscale()/cdn.vox-cdn.com/uploads/chorus_asset/file/24664739/Zelda_Tears_of_the_Kingdom_Time_Armor_set_locations_24.jpg)
Image: Nintendo EPD/Nintendo via Polygon
11. At one point you’re going to see an NPC next to a fallen statue. Beware — they’re not as harmless as they seem.
:format(webp):no_upscale()/cdn.vox-cdn.com/uploads/chorus_asset/file/24664740/Zelda_Tears_of_the_Kingdom_Time_Armor_set_locations_26.jpg)
Image: Nintendo EPD/Nintendo via Polygon
12. Continue forward, staying on the left side. At one point you’ll be able to see the next lightroot in the distance.
:format(webp):no_upscale()/cdn.vox-cdn.com/uploads/chorus_asset/file/24664742/Zelda_Tears_of_the_Kingdom_Time_Armor_set_locations_27.jpg)
Image: Nintendo EPD/Nintendo via Polygon
13. There are a few elevations to go through, but since you’re descending, it’ll be much easier this time around.
:format(webp):no_upscale()/cdn.vox-cdn.com/uploads/chorus_asset/file/24664744/Zelda_Tears_of_the_Kingdom_Time_Armor_set_locations_28.jpg)
Image: Nintendo EPD/Nintendo via Polygon
14. Once you’re getting close to the spot, you’ll come across the Corvash Canyon Mine. For now, ignore it and turn on the Worihas LightrootAt the coordinates (-3352, 2384, -0802).
:format(webp):no_upscale()/cdn.vox-cdn.com/uploads/chorus_asset/file/24664745/Zelda_Tears_of_the_Kingdom_Time_Armor_set_locations_29.jpg)
Image: Nintendo EPD/Nintendo via Polygon
15. There is a huge root to the right side of Worihas, which we’re going to use to climb over to the other side of the wall.
:format(webp):no_upscale()/cdn.vox-cdn.com/uploads/chorus_asset/file/24664747/Zelda_Tears_of_the_Kingdom_Time_Armor_set_locations_30.jpg)
Image: Nintendo EPD/Nintendo via Polygon
16. Instead of continuing to move northwest, we’ll go for a tangent and move southwest instead. It will make your navigation much simpler in the long run. Otherwise, you’re going to hit a wall that’s impossible to climb.
:format(webp):no_upscale()/cdn.vox-cdn.com/uploads/chorus_asset/file/24664753/Zelda_Tears_of_the_Kingdom_Time_Armor_set_locations_31.jpg)
Image: Nintendo EPD/Nintendo via Polygon
17. The route is linear. Make sure to open your map every now and then to make sure you’re still moving west, and continue forward.
:format(webp):no_upscale()/cdn.vox-cdn.com/uploads/chorus_asset/file/24664754/Zelda_Tears_of_the_Kingdom_Time_Armor_set_locations_32.jpg)
Image: Nintendo EPD/Nintendo via Polygon
18. You’re bound to stumble upon a tall wall at some point, but you can easily climb your way to the other end.
:format(webp):no_upscale()/cdn.vox-cdn.com/uploads/chorus_asset/file/24664756/Zelda_Tears_of_the_Kingdom_Time_Armor_set_locations_33.jpg)
Image: Nintendo EPD/Nintendo via Polygon
19. Once there, you’re going to see the lightroot at a distance. Continue to move towards the lightroot. We’re getting closer!
:format(webp):no_upscale()/cdn.vox-cdn.com/uploads/chorus_asset/file/24664757/Zelda_Tears_of_the_Kingdom_Time_Armor_set_locations_34.jpg)
Image: Nintendo EPD/Nintendo via Polygon
20. Find the coordinates (-4058, 1988, -0674)Then, activate it. So-oaw Lightroot.
:format(webp):no_upscale()/cdn.vox-cdn.com/uploads/chorus_asset/file/24664768/Zelda_Tears_of_the_Kingdom_Time_Armor_set_locations_37.jpg)
Image: Nintendo EPD/Nintendo via Polygon
21. You’ll notice on the map a section northwest with a gap. That’s where we’re heading, cornering it from the left side and up north again.
:format(webp):no_upscale()/cdn.vox-cdn.com/uploads/chorus_asset/file/24664769/Zelda_Tears_of_the_Kingdom_Time_Armor_set_locations_36.jpg)
Image: Nintendo EPD/Nintendo via Polygon
22. There are a few elevations to hop over, but they’re a lot simpler in comparison to what you’ve been through so far.
:format(webp):no_upscale()/cdn.vox-cdn.com/uploads/chorus_asset/file/24664770/Zelda_Tears_of_the_Kingdom_Time_Armor_set_locations_39.jpg)
Image: Nintendo EPD/Nintendo via Polygon
23. Once you’re on the other end, you’ll notice an enemy scanner in the distance. The beacon is a good choice.
:format(webp):no_upscale()/cdn.vox-cdn.com/uploads/chorus_asset/file/24664774/Zelda_Tears_of_the_Kingdom_Time_Armor_set_locations_40.jpg)
Image: Nintendo EPD/Nintendo via Polygon
24. As you approach, you will see a lightroot on a nearby plateau.
:format(webp):no_upscale()/cdn.vox-cdn.com/uploads/chorus_asset/file/24664776/Zelda_Tears_of_the_Kingdom_Time_Armor_set_locations_41.jpg)
Image: Nintendo EPD/Nintendo via Polygon
25. Now, to get to this lightroot, you’re going to come across a Blue-White Frox. You should try to glide as far away as you possibly can from the Blue-White Frox, while moving toward the lightroot. Oh, there’s a Colgera flying around, too, in case you weren’t terrified enough.
:format(webp):no_upscale()/cdn.vox-cdn.com/uploads/chorus_asset/file/24664777/Zelda_Tears_of_the_Kingdom_Time_Armor_set_locations_42.jpg)
Image: Nintendo EPD/Nintendo via Polygon
26. Once you reach the other side, activate the Nupisoyuat LightrootAt the coordinates (-4539, 2885, -0708).
:format(webp):no_upscale()/cdn.vox-cdn.com/uploads/chorus_asset/file/24664788/Zelda_Tears_of_the_Kingdom_Time_Armor_set_locations_43.jpg)
Image: Nintendo EPD/Nintendo via Polygon
27. Now that we have access to the area’s map, take a look at the breach located southeast from your current location. It’s covered by orange-colored structures, and that’s where we’re heading next.
:format(webp):no_upscale()/cdn.vox-cdn.com/uploads/chorus_asset/file/24664790/Zelda_Tears_of_the_Kingdom_Time_Armor_set_locations_44.jpg)
Image: Nintendo EPD/Nintendo via Polygon
28. After walking for a bit, you’ll notice that the map is indicating that there is lava surrounding the area.
:format(webp):no_upscale()/cdn.vox-cdn.com/uploads/chorus_asset/file/24664791/Zelda_Tears_of_the_Kingdom_Time_Armor_set_locations_45.jpg)
Image: Nintendo EPD/Nintendo via Polygon
29. You can get to the top by climbing over the wall that is right in front of the area. Then, use the long root you see on the map to make your way slowly up.
:format(webp):no_upscale()/cdn.vox-cdn.com/uploads/chorus_asset/file/24664793/Zelda_Tears_of_the_Kingdom_Time_Armor_set_locations_46.jpg)
Image: Nintendo EPD/Nintendo via Polygon
30. You will reach the Sturnida Lavafalls by following this route. You can then follow this root as your primary path.
:format(webp):no_upscale()/cdn.vox-cdn.com/uploads/chorus_asset/file/24664794/Zelda_Tears_of_the_Kingdom_Time_Armor_set_locations_47.jpg)
Image: Nintendo EPD/Nintendo via Polygon
31. When you’re getting close to the lava, you’ll spot a few structures with PoePickups are a good idea. They are a lot of them. It is atop the tallest tower.
:format(webp):no_upscale()/cdn.vox-cdn.com/uploads/chorus_asset/file/24664795/Zelda_Tears_of_the_Kingdom_Time_Armor_set_locations_48.jpg)
Image: Nintendo EPD/Nintendo via Polygon
32. Keep in mind that since the lava is super close, you’ll suffer damage from high temperatures here. Equip the Flamebreaker Armor if you possess it. Grab the armor and run away if you don’t have it.
:format(webp):no_upscale()/cdn.vox-cdn.com/uploads/chorus_asset/file/24664797/Zelda_Tears_of_the_Kingdom_Time_Armor_set_locations_49.jpg)
You will receive the following when you open the chest Cap of TimeIt is a piece of armor with 3 defense. That’s all for the Time Armor set!
#Time #Armor #set #Zelda #Tears #Kingdom


