
GoldenEye Dam walkthrough, from covert modem to alarm locations
GoldenEye 007’s first mission, Dam, you’re dropped off at the base of a dam in the former Soviet Union, and it’s your job to infiltrate the facility and intercept the shipping and contact information.
Your difficulty will determine how difficult it is to set off alarms and intercept data. Once you are done, you’ll be able to bungee jump safe. GoldenEye 007 Walking through Dam
Before starting Dam in Goldeneye, 007: Tips
- If you’re used to regular aiming conventions, switch your aim from inverted to upright in the start menu.
- On default control schemes, interacting with objects and doors is done by pressing the “B” button on the Nintendo Switch and the “A” button on Xbox. When it comes to aiming, use the aim feature, “L” on the Nintendo Switch and “LT” on the Xbox, to aim at the alarms and the small screen for the Covert Modem.
- Use the silent pistol when setting off the alarms to stop more enemy from entering the area.
- To make it easy for enemies to approach you through the tunnel, be sure to have your sniper rifle handy.
- The Suspend menu on Nintendo Switch allows you to create check points. Press the “-” button to open the Suspend menu, and create a Suspend point to make your own check point. This feature is especially useful for the 00 Agent difficulty. No, there’s no suspend for the Xbox version.
Dam Objectives
You can complete up to four objectives at the Dam, depending on your difficulty. Here are four goals:
- Obj. A — Neutralize all alarms (Secret Agent difficulty and above)
- Obj. B — Install covert modem (00 Agent difficulty)
- Obj. C — Intercept data backup (00 Agent difficulty)
- Obj. D — Bungee jump from platform (Agent difficulty and above)
This is how you complete each goal, step by step.
Dam Security Area
-

Location of the sniper on Dam in GoldenEye007
Image: Rare/Nintendo via Polygon
-
Location of the sniper on Dam in GoldenEye007
Image: Rare/Nintendo via Polygon
-

Location of the sniper on Dam in GoldenEye007
Image: Rare/Nintendo via Polygon
- Move to your left, and grab the pistol quickly.
- Pick up the guard’s rifle and defeat the guards around the guard tower with your pistol or rifle. There is also a sniper rifle You can find it at the top and use it against any enemies.
- The tunnel guards can be defeated from afar with the sniper, or face-to-face with your other weapons.
- Continue following the truck to the next location.
How to Install the Covert Modem
- Cover yourself behind the boxes and eliminate the five enemies. If you move quickly, you can avoid the two enemies at the bunker.
- To open the gate, interact with the switch and then activate the next switch.
- To stop them setting off an alarm, quickly eliminate the enemies located in the area.
- Keep going and you will see the red alarm at the wall. This will neutralize the other alarms. This is only one of the four locations. To see them all, please see the following section.
- Continue inside by going through the gate to the right.
- To find the screen, turn right and walk behind the stack crates to the side of the building. See the image gallery above to see how it looks.
- Switch to inventory by opening the start menu.
- You can select the covert modm in your inventory. Then, use the fire button to carefully drop it onto the screen. Only one modem is available, so don’t miss it.Now comes the final step Obiective B.
- Take a right turn out of the area and then shoot the lock to unlock the gate.
- Keep going until the dam reaches its top.
Intercept data backup
:format(webp):no_upscale()/cdn.vox-cdn.com/uploads/chorus_asset/file/24390034/serversdam.png)
Image: Rare/Nintendo via Polygon
- You will find the first guard tower.
- Locate the red alarm and fire it.
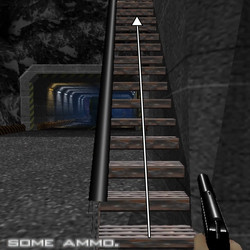
- You will find an underground tunnel system by going down the staircase inside the tower. Filled with enemies.
- Go through the gate. Turn left and defeat all enemies. Take care to Check your cornersThere are always enemies around.
- To find more enemies in the room, open the door at end of corridor. But wait until you see the doors. To easily get out of the room, allow the enemies to approach you.
- Interact with the rectangular servers on the left side of the room, which will start a timer depicting how long it’ll take to transfer the data due to your covert modem — Completing Objective C.
- You can exit the room by going back to the top of the staircase you were on before. You will see the number 2 on the wall at the entrance of the stairs.
- You will find the second guard tower.
- You can find the alarm in your home and then neutralize it.
- For the third guard tower, repeat steps 8 through 9.
Locations for alarms
Though we’ll cover these as we go in the above sections, here is at a glance the four alarm locations, in the event you finished the mission and managed to miss one or two:
- You must first install the covert modem before reaching the towers at the top of the dam.
- Three guard towers are located on the dam. The second alarm can be found inside the entrance of the first tower.
- This second tower houses the third alarm, which is located just outside the door of the wall.
- You have used the third and last guard tower. You must open the door to destroy it. If you completed all the previous tasks, then this goal should be accomplished.
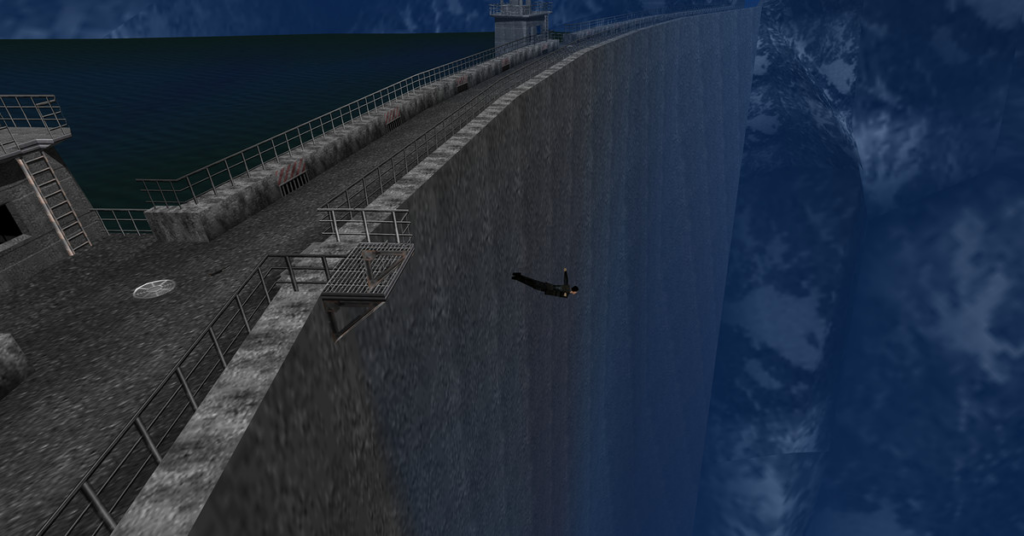
Bungee Jump from Platform
:format(webp):no_upscale()/cdn.vox-cdn.com/uploads/chorus_asset/file/24390593/Stairs.png)
Image: Rare/Nintendo via Polygon
After you’ve completed the objectives in the dam area you will find small steps leading to a platform.
You can then simply traverse the railings to the water below and escape the prison.
This completes Mission 1: Arkangelsk’s Dam section and opens the door to Facility.
Before you move on, it might be worth unlocking this level’s GoldenEye 007 cheat, now you’re fully familiar with its objectives.
#GoldenEye #Dam #walkthrough #covert #modem #alarm #locations


