
Bayonetta 3 Broken Witch Hearts location guide: Where to find every one
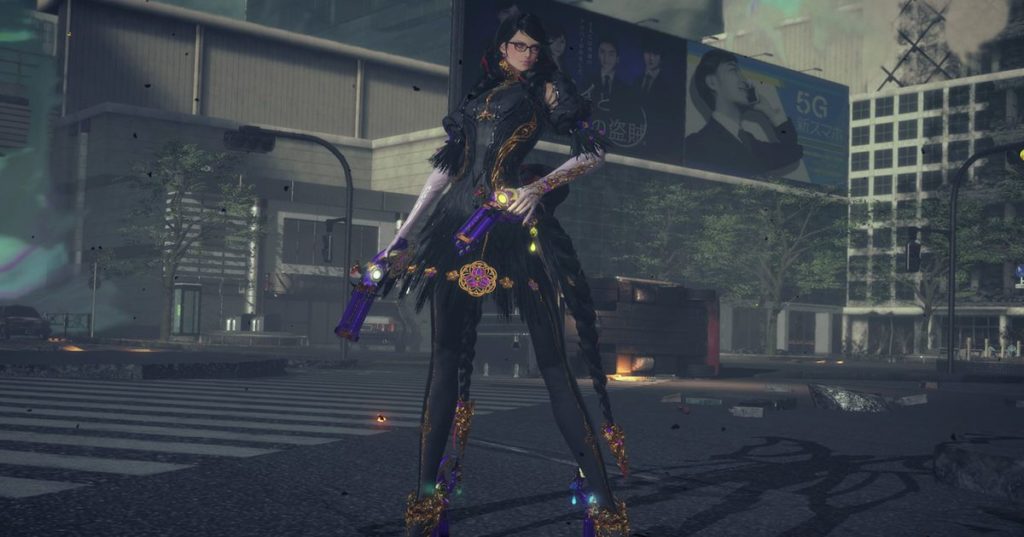
Bayonetta 3, The Broken Witch Hearts is a critical item which allows you to improve your health. Once you’ve collected four of them, they’ll automatically become a full Witch Heart, which you can use in the Skills menu for both Bayonetta and Viola throughout the story. While Rodin’s shop has a few of them up for purchase, and others are rewarded for completing Phenomenal Remnants, most are scattered throughout the levels.
Remember that the guide is currently in process. The Broken Witch Heart guide is currently in progress. It covers chapters 7 through 7. This should provide Bayonetta/Viola with a boost to overall health.
Chapter 1.
During the first open area with the waterfall on one end, you’ll find the “Bite and toss them!” trial pretty much automatically to a side. To activate Witch Time, dodge right before they reach Bayonetta. To bite your demon during Witch Time, use LZ to summon them and then press R. You will see the demon automatically throw them into the air. To complete the challenge, repeat this three more times. The attack won’t work outside of Witch Time! Trust me. You will receive a broken witch heart as your reward.
:format(webp):no_upscale()/cdn.vox-cdn.com/uploads/chorus_asset/file/24149874/bayonetta_3_broken_witch_heart_chapter_1___a.jpg)
Image: Platinum/Nintendo via Polygon
For the second one, you’ll see a locked door behind a waterfall. Once you follow the path up toward the waypoint, you’ll stumble upon Verse 3. After finishing it, continue moving forward just a bit and turn to the left where you’ll see a massive key floating. Grab it and go back to the waterfall. You will receive a Broken Witch Heart as your reward.
:format(webp):no_upscale()/cdn.vox-cdn.com/uploads/chorus_asset/file/24149880/bayonetta_3_broken_witch_heart_chapter_1_b.jpg)
Image: Platinum/Nintendo via Polygon
:format(webp):no_upscale()/cdn.vox-cdn.com/uploads/chorus_asset/file/24149883/bayonetta_3_broken_witch_heart_chapter_1_c.jpg)
Image: Platinum/Nintendo via Polygon
Once you stumble upon Rodin’s shop, head over to the nearby trial on the other side of the street called “Defeat all enemies!” It’s straightforward, so you won’t have any issues. You will receive a Broken Witch Heart as your reward.
:format(webp):no_upscale()/cdn.vox-cdn.com/uploads/chorus_asset/file/24149903/bayonetta_3_broken_witch_heart_chapter_1_d.jpg)
Image: Platinum/Nintendo via Polygon
In the subway tunnels, after you get the tutorial message called “Taking Deliveries,” shoot the little guy to obtain a full Witch Heart.
:format(webp):no_upscale()/cdn.vox-cdn.com/uploads/chorus_asset/file/24149905/bayonetta_3_broken_witch_heart_chapter_1_e.jpg)
Image: Platinum/Nintendo via Polygon
Chapter 2
After summoning your spider demon, move the spider towards the wreckage of the building, which is located right beside a flame in the corner overlooking the start area. Use your attacks to take down the floating chest. Once opened, you’ll obtain a Broken Witch Heart.
:format(webp):no_upscale()/cdn.vox-cdn.com/uploads/chorus_asset/file/24149915/bayonetta_3_broken_witch_heart_chapter_2_a.jpg)
Image: Platinum/Nintendo via Polygon
In that same open area, you’ll find a floating chest on your way to the main waypoint. You can destroy the floating chest to trigger a timed event in which you must collect five floating pieces. It’s a rather straightforward one, and once it’s over, you’ll get another Broken Witch Heart for your efforts.
:format(webp):no_upscale()/cdn.vox-cdn.com/uploads/chorus_asset/file/24149922/bayonetta_3_broken_witch_heart_chapter_2_b.jpg)
Image: Platinum/Nintendo via Polygon
:format(webp):no_upscale()/cdn.vox-cdn.com/uploads/chorus_asset/file/24149923/bayonetta_3_broken_witch_heart_chapter_2_c.jpg)
Image: Platinum/Nintendo via Polygon
Head over to the small building, which has spiral staircases going underground. If you look at the building on the opposite side, you’ll notice an enemy crawling on the wall. To earn the Broken Witch Heart, get close enough to shoot at it.
:format(webp):no_upscale()/cdn.vox-cdn.com/uploads/chorus_asset/file/24149926/bayonetta_3_broken_witch_heart_chapter_2_d.jpg)
Image: Platinum/Nintendo via Polygon
After you throw the water tank and complete the fight in the new passage, head to the opposite end of the Perseus Cafe on the corner, and you’ll see a trial at the far end of an alleyway between two buildings. It’s not a hard trial; you’ll just need to activate Witch Time in order to deal damage. You should wait until the end to get the perfect dodge. This will allow the effect to last for longer. Once you’re done with the enemies, you’ll get another Broken Witch Heart.
:format(webp):no_upscale()/cdn.vox-cdn.com/uploads/chorus_asset/file/24149927/bayonetta_3_broken_witch_heart_chapter_2_e.jpg)
Image: Platinum/Nintendo via Polygon
While you’re in the Spider section destroying the flower-looking enemies, keep an eye for a chest on the right side, sitting on top of what seems to be a light-blue helipad spot. To obtain another Broken Witch Heart, destroy it.
:format(webp):no_upscale()/cdn.vox-cdn.com/uploads/chorus_asset/file/24149929/bayonetta_3_broken_witch_heart_chapter_2_g.jpg)
Image: Platinum/Nintendo via Polygon
Chap. 3
Continue to the left after you have completed Verse 3. You will find a huge building that has tons of Orb plant on it. The red blink is your sign that you are near the top of this building. You will see a red blink.
:format(webp):no_upscale()/cdn.vox-cdn.com/uploads/chorus_asset/file/24149939/bayonetta_3_broken_witch_heart_chapter_3_a.jpg)
Image: Platinum/Nintendo via Polygon
Before you head to the main gate, look to the left and you’ll notice another chest. This one, surprise, turns into an enemy, but it’s a fairly easy encounter. Once you’re done, you’ll be the proud owner of another Broken Witch Heart.
:format(webp):no_upscale()/cdn.vox-cdn.com/uploads/chorus_asset/file/24149944/bayonetta_3_broken_witch_heart_chapter_3_b.jpg)
Image: Platinum/Nintendo via Polygon
If you finish the Trial to the Right of the Main Gate, you can still get another Broken Witch Heart. For this one, your main objective is to survive, but you’ll have to deal with a strong wind that pushes you back towards the middle. Pro tip: Turn into the butterfly and keep moving on the opposite direction — then, whenever you’re about to get hit, either dodge when you can or enter Witch Time, which will allow you to move freely and reposition yourself as needed. You can also attack the enemies around you to get a higher score, but it’s not mandatory. Once you’re done, grab the Broken Witch Heart on your way to the exit.
:format(webp):no_upscale()/cdn.vox-cdn.com/uploads/chorus_asset/file/24149947/bayonetta_3_broken_witch_heart_chapter_3_c.jpg)
Image: Platinum/Nintendo via Polygon
Verse 5. After exiting the arena through the gate with the large gates, turn right and remove the junk to uncover another chest. To get the Broken Witch Heart, you can rip it apart using any weapon.
:format(webp):no_upscale()/cdn.vox-cdn.com/uploads/chorus_asset/file/24149950/bayonetta_3_broken_witch_heart_chapter_3_d.jpg)
Image: Platinum/Nintendo via Polygon
Chap. 4
After Verse 1, while facing toward the main waypoint, look to your left; you’ll see a pathway leading inside of a cave passage that ends with a cliff. There’s a floating chest there which, upon opening, summons a timed challenge. This one looks hard, but don’t worry as there are platforms to use. Grab the nearest ones and use the one that is moving up or down to grab the next two. You can do it! Complete it and you’ll get a Broken Witch Heart.
:format(webp):no_upscale()/cdn.vox-cdn.com/uploads/chorus_asset/file/24150063/bayonetta_3_broken_witch_heart_chapter_4_a.jpg)
Image: Platinum/Nintendo via Polygon
:format(webp):no_upscale()/cdn.vox-cdn.com/uploads/chorus_asset/file/24150064/bayonetta_3_broken_witch_heart_chapter_4_b.jpg)
Image: Platinum/Nintendo via Polygon
:format(webp):no_upscale()/cdn.vox-cdn.com/uploads/chorus_asset/file/24150067/bayonetta_3_broken_witch_heart_chapter_4_c.jpg)
Image: Platinum/Nintendo via Polygon
Once you’re done with Verse 1 and make it to the other end to arrive at the new open area (Bayonetta will say something about a kitty while you’re around), take the path to the left. Keep going down, until you reach a chest. You are now ready to fight another mimic. Once you’re done, you’ll earn an additional Broken Witch Heart.
:format(webp):no_upscale()/cdn.vox-cdn.com/uploads/chorus_asset/file/24150069/bayonetta_3_broken_witch_heart_chapter_4_d.jpg)
Image: Platinum/Nintendo via Polygon
:format(webp):no_upscale()/cdn.vox-cdn.com/uploads/chorus_asset/file/24150071/bayonetta_3_broken_witch_heart_chapter_4_e.jpg)
Image: Platinum/Nintendo via Polygon
Just before you approach the huge blue door on your right, go to the left cliff. You’ll see some trees and a flying chest. To get the Broken Witch Heart, destroy it using your demon or other weapon.
:format(webp):no_upscale()/cdn.vox-cdn.com/uploads/chorus_asset/file/24150076/bayonetta_3_broken_witch_heart_chapter_2_f.jpg)
Image: Platinum/Nintendo via Polygon
:format(webp):no_upscale()/cdn.vox-cdn.com/uploads/chorus_asset/file/24150077/bayonetta_3_broken_witch_heart_chapter_4_g.jpg)
Image: Platinum/Nintendo via Polygon
Don’t go through the portal just yet — instead, as you’re approaching the beginning of the staircase, head over to the right side of the main path to find a crawling buddy with a Broken Witch Heart inside its box.
:format(webp):no_upscale()/cdn.vox-cdn.com/uploads/chorus_asset/file/24150238/bayonetta_3_broken_witch_heart_chapter_4_p.jpg)
Image: Platinum/Nintendo via Polygon
:format(webp):no_upscale()/cdn.vox-cdn.com/uploads/chorus_asset/file/24150239/bayonetta_3_broken_witch_heart_chapter_4_q.jpg)
Image: Platinum/Nintendo via Polygon
After Verse 2, head over to the left side of the area where you’ll find a chest sitting on top of a rooftop (right before the massive statue, in case you haven’t destroyed it yet). To get the Broken Witch Heart, destroy it.
:format(webp):no_upscale()/cdn.vox-cdn.com/uploads/chorus_asset/file/24150080/bayonetta_3_broken_witch_heart_chapter_4_h.jpg)
Image: Platinum/Nintendo via Polygon
After Verse 4, once you’re on the bridge of the new area, where the soldiers start cheering at Bayonetta, head over to the right side. You’ll see another building that is a bit far away. You can swing your way to the opposite side by using the spider. After you reach the other side, keep your feet on the ground. There’s a chest with a Broken Witch Heart inside.
:format(webp):no_upscale()/cdn.vox-cdn.com/uploads/chorus_asset/file/24150081/bayonetta_3_broken_witch_heart_chapter_4_i.jpg)
Image: Platinum/Nintendo via Polygon
:format(webp):no_upscale()/cdn.vox-cdn.com/uploads/chorus_asset/file/24150083/bayonetta_3_broken_witch_heart_chapter_4_j.jpg)
In the area where you have to open the door by using the Train again to destroy three enemies, you’ll see the “Attack them all in one run!” trial on the right side. Here you can make eight attacks on the same enemy using your Train. The best way to do this is to line the two moving enemies up on the opposite side of those stationary, and then create a path that allows the train through. Then, go around and catch the final ones.
:format(webp):no_upscale()/cdn.vox-cdn.com/uploads/chorus_asset/file/24150085/bayonetta_3_broken_witch_heart_chapter_4_k.jpg)
Image: Platinum/Nintendo via Polygon
:format(webp):no_upscale()/cdn.vox-cdn.com/uploads/chorus_asset/file/24150088/bayonetta_3_broken_witch_heart_chapter_4_l.jpg)
Image: Platinum/Nintendo via Polygon
While doing the puzzle as tiny Bayonetta, make sure to leave some of the pieces of the wreckage on the building lined up so you can climb over them and get to the open “balcony” there. Double-jump your way up and, when you’re back to your regular self, head down the corridor to find a chest with a Broken Witch Heart inside.
:format(webp):no_upscale()/cdn.vox-cdn.com/uploads/chorus_asset/file/24150091/bayonetta_3_broken_witch_heart_chapter_4_m.jpg)
Image: Platinum/Nintendo via Polygon
:format(webp):no_upscale()/cdn.vox-cdn.com/uploads/chorus_asset/file/24150095/bayonetta_3_broken_witch_heart_chapter_4_n.jpg)
Image: Platinum/Nintendo via Polygon
:format(webp):no_upscale()/cdn.vox-cdn.com/uploads/chorus_asset/file/24150098/bayonetta_3_broken_witch_heart_chapter_4_o.jpg)
Image: Platinum/Nintendo via Polygon
Chapter 5.
This isn’t exactly a Broken one but rather a full Witch Heart. Continue to the left, instead of heading toward the main pathpoint. Once you have completed Verse 6, fall down below for a trial. This one is easy. Enemies can regenerate their lives, and you can attack them with whatever you have. Once you’re done, you’ll have a full Witch Heart. You can’t use it with Viola just yet, so you’ll have to wait.
:format(webp):no_upscale()/cdn.vox-cdn.com/uploads/chorus_asset/file/24150106/bayonetta_3_broken_witch_heart_chapter_5_a.jpg)
Image: Platinum/Nintendo via Polygon
Continue on to Verse 8. There, aside from a collectible figure, you’ll see a chest that goes up and down. My method of charging a blade attack was to charge a second one and shoot darts at the first. If you time it right it shouldn’t take more than two tries. There’s a Broken Witch Heart inside the chest.
:format(webp):no_upscale()/cdn.vox-cdn.com/uploads/chorus_asset/file/24150108/bayonetta_3_broken_witch_heart_chapter_5_b.jpg)
Image: Platinum/Nintendo via Polygon
:format(webp):no_upscale()/cdn.vox-cdn.com/uploads/chorus_asset/file/24150109/bayonetta_3_broken_witch_heart_chapter_5_c.jpg)
Chapter 6
Early on in the level, after you destroy the tower to create a bridge, you’ll face a long walk with an absurd amount of lava on the sides. Turn on your Spider demon, and move to the left. You can also use the chest to summon floating platforms. However, it should still work. Then, complete the small puzzle to morph into child Bayonetta, and time the wreckage so the lava isn’t touching the small living room on the other side. Use the wreckage to cross the room and then turn the corner for a Broken Witch Heart.
:format(webp):no_upscale()/cdn.vox-cdn.com/uploads/chorus_asset/file/24150110/bayonetta_3_broken_witch_heart_chapter_6_a.jpg)
Image: Platinum/Nintendo via Polygon
:format(webp):no_upscale()/cdn.vox-cdn.com/uploads/chorus_asset/file/24150111/bayonetta_3_broken_witch_heart_chapter_6_b.jpg)
Image: Platinum/Nintendo via Polygon
:format(webp):no_upscale()/cdn.vox-cdn.com/uploads/chorus_asset/file/24150113/bayonetta_3_broken_witch_heart_chapter_6_b_2.jpg)
Image: Platinum/Nintendo via Polygon
From where you just did the previous sequence, you’ll see a small wreckage with a soldier on top and a chest next to the area you just went into. Upon destroying it, you’ll unlock a time-based challenge. It’s not a hard one at all: Just continue using the spider and remember to swing whenever you want to close a bit of distance. You’ll net yourself another Broken Witch Heart for your time and effort.
:format(webp):no_upscale()/cdn.vox-cdn.com/uploads/chorus_asset/file/24150114/bayonetta_3_broken_witch_heart_chapter_6_c.jpg)
Image: Platinum/Nintendo via Polygon
:format(webp):no_upscale()/cdn.vox-cdn.com/uploads/chorus_asset/file/24150116/bayonetta_3_broken_witch_heart_chapter_6_d.jpg)
Image: Platinum/Nintendo via Polygon
:format(webp):no_upscale()/cdn.vox-cdn.com/uploads/chorus_asset/file/24150118/bayonetta_3_broken_witch_heart_chapter_6_e.jpg)
Image: Platinum/Nintendo via Polygon
As a reward, you will receive a full Witch Heart. After Verse 7, you’re going to be using an elevator to get to a higher ground. You can find a trial by going to the left side before continuing on to the main route. The floor here will cause you to be injured, however, you can use your summon demon to get around this. Concentrate on B attacks against the enemies and the flying enemy, while keeping them at bay with Y attacks. It shouldn’t take more than a few seconds to get rid of all of them. Once that’s a wrap, you’ll have a fresh Witch Heart to consume.
:format(webp):no_upscale()/cdn.vox-cdn.com/uploads/chorus_asset/file/24150120/bayonetta_3_broken_witch_heart_chapter_6_f.jpg)
Image: Platinum/Nintendo via Polygon
Chapter 7
Soon after you start the level, when you’re in the big open area before heading toward the bridge, go to your right. You’ll find a glowing plateau. Jump on top of it and you’ll be able to jump around all the other platforms. One of them has a chest, so you need to get on it while it’s moving. To get the Broken Witch Heart, you can destroy the chest.
:format(webp):no_upscale()/cdn.vox-cdn.com/uploads/chorus_asset/file/24150122/bayonetta_3_broken_witch_heart_chapter_7_a.jpg)
Image: Platinum/Nintendo via Polygon
:format(webp):no_upscale()/cdn.vox-cdn.com/uploads/chorus_asset/file/24150123/bayonetta_3_broken_witch_heart_chapter_7_b.jpg)
Image: Platinum/Nintendo via Polygon
After Verse 1, you’ll stumble upon a plateau with a trial, as well as a waterfall behind it. You will find elevations in the area’s outer left corner that will lead you to a chest. This is another time-based puzzle, but it’s a bit tricky. Here’s how I did it: Run normally, don’t sprint, towards the first cube. To get the mushrooms, move forward and double-jump. The other cubes can be grabbed by going all the way up the branch. Jump, grab your grappling hook and hold the cube. Then, double-jump until you reach the ground. Don’t double-jump right away. To get the Broken Witch Heart, grab the fifth cube once you’re at ground-level.
:format(webp):no_upscale()/cdn.vox-cdn.com/uploads/chorus_asset/file/24150130/bayonetta_3_broken_witch_heart_chapter_7_c.jpg)
Image: Platinum/Nintendo via Polygon
:format(webp):no_upscale()/cdn.vox-cdn.com/uploads/chorus_asset/file/24150131/bayonetta_3_broken_witch_heart_chapter_7_d.jpg)
Image: Platinum/Nintendo via Polygon
:format(webp):no_upscale()/cdn.vox-cdn.com/uploads/chorus_asset/file/24150133/bayonetta_3_broken_witch_heart_chapter_7_e.jpg)
Image: Platinum/Nintendo via Polygon
While you’re playing as Cheshire out in the desert, you’ll stumble upon a dig site as soon as you exit the first passage with enemies. You can find the Broken Witch Heart by digging the chest.
:format(webp):no_upscale()/cdn.vox-cdn.com/uploads/chorus_asset/file/24150134/bayonetta_3_broken_witch_heart_chapter_7_f.jpg)
Image: Platinum/Nintendo via Polygon
:format(webp):no_upscale()/cdn.vox-cdn.com/uploads/chorus_asset/file/24150136/bayonetta_3_broken_witch_heart_chapter_7_g.jpg)
Image: Platinum/Nintendo via Polygon
Continue the sequence with Cheshire, until Viola is in the water. Then, head back to where you came from (so, the entrance of the canyon toward this open area you’re at now) and look for a small breach to the left that leads to another corridor.
Head all the way to the other side and you’ll find Verse 6. Keep moving until you reach the next spot. As you move to the next corner toward Verse 7, you’ll see a massive temple. You can summon Cheshire by going to the statue in the corner. With your summon, run across the platform and you will find the door. Head to the second level and knock down the chest. It is a duplicate, so be prepared to fight for your Broken Witch Heart.
:format(webp):no_upscale()/cdn.vox-cdn.com/uploads/chorus_asset/file/24150216/bayonetta_3_broken_witch_heart_chapter_7_h.jpg)
Image: Platinum/Nintendo via Polygon
:format(webp):no_upscale()/cdn.vox-cdn.com/uploads/chorus_asset/file/24150218/bayonetta_3_broken_witch_heart_chapter_7_i.jpg)
Image: Platinum/Nintendo via Polygon
:format(webp):no_upscale()/cdn.vox-cdn.com/uploads/chorus_asset/file/24150220/bayonetta_3_broken_witch_heart_chapter_7_j.jpg)
Bayonetta runs next to a cliff in a desert in Bayonetta 3.
:format(webp):no_upscale()/cdn.vox-cdn.com/uploads/chorus_asset/file/24150222/bayonetta_3_broken_witch_heart_chapter_7_l.jpg)
Bayonetta runs next to a cliff in a desert in Bayonetta 3.
:format(webp):no_upscale()/cdn.vox-cdn.com/uploads/chorus_asset/file/24150224/bayonetta_3_broken_witch_heart_chapter_7_m.jpg)
Bayonetta runs next to a cliff in a desert in Bayonetta 3.
For this one, you’re going to have to trek a bit. Take the left side, just past the waterfalls, to reach the desert area with the sand stream. You can continue onwards to the next end. You’re going to encounter an enemy as well as a chest. Destroy the chest and take care of the enemy, and then use the platforms to move across to the trial (there’ll be more enemies, but you can either ignore them or use ranged attacks, or Cheshire, to get rid of them).
It is necessary to eliminate enemies from a variety of platforms in the trial. The first wave required me to stand on the main platform in the middle, move up for the second, and finally return to the primary one in the middle. Cheshire is a great tool to throw your enemies off the ledges. Once done, you’ll get the Broken Witch Heart.
:format(webp):no_upscale()/cdn.vox-cdn.com/uploads/chorus_asset/file/24150164/bayonetta_3_broken_witch_heart_chapter_7_n.jpg)
Image: Platinum/Nintendo via Polygon
:format(webp):no_upscale()/cdn.vox-cdn.com/uploads/chorus_asset/file/24150201/bayonetta_3_broken_witch_heart_chapter_7_o.jpg)
Image: Platinum/Nintendo via Polygon
:format(webp):no_upscale()/cdn.vox-cdn.com/uploads/chorus_asset/file/24150205/bayonetta_3_broken_witch_heart_chapter_7_p.jpg)
Image: Platinum/Nintendo via Polygon
Continue moving ahead through the section of quicksand until you pass the tower at the center. (If you pay attention to the waterfalls to the right, you’ll spot a moving chest.) Move over to the rock and smash it. I suggest melee and ranged attack if it is nearby. Once you’re done, you’ll obtain yet another Broken Witch Heart.
:format(webp):no_upscale()/cdn.vox-cdn.com/uploads/chorus_asset/file/24150210/bayonetta_3_broken_witch_heart_chapter_7_q.jpg)
Image: Platinum/Nintendo via Polygon
:format(webp):no_upscale()/cdn.vox-cdn.com/uploads/chorus_asset/file/24150212/bayonetta_3_broken_witch_heart_chapter_7_r.jpg)
Image: Platinum/Nintendo via Polygon
#Bayonetta #Broken #Witch #Hearts #location #guide #find


