
Wild Hearts: giant Kemono monster locations, strategies, weaknesses
Wild HeartsThe roster includes more than one dozen Kemono. They are massive, monstrosities who roam throughout the Monster Hunter-inspired world. The biggest of these creatures are known as giant Kemono; as you make your way through the story, you’ll encounter more of these beasts.
While some are certainly more difficult than others, they’re all tougher than your standard fare. We’ve cobbled together a list of giant Kemono, where they appear (and roughly when), and their individual weaknesses. And if you’re looking for advice on defeating these monsters, keep reading — we’ve detailed top-level strategies for defeating every giant Kemono in Wild Hearts.
All giant Kemono in Wild Hearts
In order of when they appear in your game, here’s a list of every giant Kemono in Wild Hearts, plus information about where to find them and what they’re weak against:
Wild Hearts’ giant Kemono-list
| Kemono | Lage | Elemental Weakness | Weakness with Weapons |
|---|---|---|---|
| Kemono | Lage | Elemental Weakness | Weakness in Weapons |
| Ragetail | Blossom Trail (Chapters 1, 2) | The Fire | Blunt and Slashing |
| Sapscourge | Blossom Trail (Chs. 1, 2) | The Fire | The Slashing of |
| Kingtusk | Blossom Trail (Chs. 1, 2) | The Fire | Piercing and Slashing |
| Spineglider | Spirit Isle Hunt/Blossom Trail (Chs. 1, 2) | Plant or Fire? | Blunt |
| Dreadclaw | Spirit Isle Hunt, (Chs. 1, 2) | The Fire | The Slashed |
| Gritdog | Spirit Isle Hunt, (Chs. 1, 2) | Wind | Slashing and Piercing |
| Lavaback | Spirit Isle Hunt/Blossom Trail/Akikure Canyon (Chs. 1, 2) | Water | Blunting, Slashing |
| Earthbreaker | Spirit Isle (Ch. 1) | Wind | Blunt, Piercing |
| Sporetail | Akikure Canyon (Ch. 1) | The Fire | Blunt and Slashing |
| Fumebeak | Blossom Trial Hunt/Akikure Canyon/Fuyufusagi Fort (Ch. 2) | Earth | Piercing |
| Goldshard | Akikure Canyon (Ch. 2) | Wind, Plant | Blunt, Piercing |
| Icetusk | Fuyufusagi Fort (Ch. 2) | The Fire | Blunt, Piercing |
| Cobalt Lavaback | Fuyufusagi Fort (Ch. 2) | Water | Piercing |
| Deathstalker | Fuyufusagi Fort (Ch. 2) | The Fire | Piercing |
| Mighty Ragetail | Blossom Trail (Chs. 3, 4) | The Fire | Blunt and Slashing |
| A Mighty Place to Shop | Blossom Trail/Akikure Canyon (Chs. 3, 4) | The Fire | Blunt and Slashing |
| Mighty Sapscourge | Blossom Trail (Chs. 3, 4) | The Fire | The Slashing of |
| Mighty Kingtusk | Blossom Trail/Fuyufusagi Fort (Chs. 3, 4) | The Fire | Piercing and Slashing |
| Mighty Spinegilder | Akikure Canyon/Spirit Isle (Chs. 3, 4) | Plants and Fire | Blunt |
| Mighty Dreadclaw | Akikure Canyon (Chs. 3, 4) | The Fire | The Slashing of |
| Mighty Gritdog | Akikure Canyon/Spirit Isle (Chs. 3, 4) | Wind | Slashing, Piercing |
| Mighty Goldshard | Blossom Trail/Akikure Canyon (Chs. 3, 4) | Wind and Plant | Blunt, Piercing |
| Mighty Lavaback | Spirit Isle (Chs. 3, 4) | Water | Blunt and Slashing |
| Mighty Cobalt Lavaback | Fuyufusagi Fort (Chs. 3, 4) | Water | Piercing |
| Mighty Icetusk | Fuyufusagi Fort (Chs. 3, 4) | The Fire | Blunt, Piercing |
| Mighty Deathstalker | Fuyufusagi Fort/Spirit Isle (Chs. 3, 4) | The Fire | Piercing |
| Venom Glider | Blossom Trail (Chs. 3, 4) | Plant or Fire? | Blunt |
| Ripclaw | Fuyufusagi Fort/Spirit Isle (Chs. 3, 4) | Earth, Fire and Plant | The Slashing of |
| Onyxshard | Blossom Trail (Ch. 4) | Plant, Wind | Blunt, Piercing |
| Mighty Fumebeak | Spirit Isle (Ch. 4) | Earth | Piercing |
| Amaterasu | Akikure Canyon (Ch. 4) | Wind | Blunt and Slashing |
| Emberplume | Spirit Isle (Ch. 4) | Water, Earth | Piercing and Slashing |
| Golden Tempest | Akikure Canyon (Ch. 4) | Fire is Earth | Piercing |
Chapter 1: How to defeat the gigantic Kemono, Wild Hearts
:format(webp):no_upscale()/cdn.vox-cdn.com/uploads/chorus_asset/file/24440280/wild_hearts_Lavaback_01.png)
Image: Omega Force/Koei Tecmo/Electronic Arts via Polygon
More than a handful of Kemono are available to challenge in chapter one, “Azuma, Land of the East.” After you initially defeat a Kemono during a mission, it will potentially appear in other regions once they open up during that specific chapter. Certain Kemono can be moved around, so they aren’t locked in one place. You can also take on more intense hunts to fight Kemono, so you may be able to face off with more of these terrifying beasts simultaneously.
Ragetail
You will be fighting in the Ragetail, the largest Kemono. Wild Hearts. Thankfully, it’s a fairly easy one to take down. Although it is vulnerable to blunt and slashing damage as well, the bow works perfectly. You can also use fire to inflict additional damage on this rodent if you have the Torch Karakuri.
Sapscourge
The Sapscourge, another giant Kemono based on plants, is the weakest of all. It can inflict blunt and piercing damage as well. As the Ragetail the Sapscourge can take more fire damage. You will find the Spring Karakuri to be your friend during this battle. It will help you shake off the Sapscourge’s sap, which can slow down your movements if it becomes encased.
Kingtusk
Like the Ragetail and Sapscourge before it, the massive Kingtusk is weak to fire — which makes sense, since it is another plant-based Kemono and can summon vines to shoot out of the ground at a whim. This creature takes most of the damage due to piercing or slashing. Once it’s enraged, make sure to dodge its vine attacks since they can stagger you and leave you susceptible to its devastating charge attacks.
Spineglider
Spineglider can be harmed by fire or plant injury. This is why players should practice Karakuri. You will be able to use the Pounder Fusion Karakuri to defeat the Spineglider. This can stop the creation of any rocks it can make. You can not only do massive damage, but you will also break the Spineglider’s perch. This will prevent it from lunging towards you with an aggressive sweeping attack. It can only be damaged by blunt weapons.
Dreadclaw
The Dreadclaw, a massive, branch-like rooster that has a tail like a tree, is vulnerable to fire damage. The Torch Karakuri, which imbues your weapon in fire with additional damage like the Kingtusk and Kingtusk will allow you to deal more damage to the Kemono. The weakest form of the Torch Karakuri is Slashing. It can perform successive lunging attacks. You should time your dodges carefully to avoid getting caught in the combos.
Gritdog
This Tanuki with earth aspects packs a punch. It can not only attract hunters to close range due to its ability to manipulate ground beneath your feet but it can also cause stalactites and stomp up under you at range. Even when angry, the Gritdog’s speed is quite slow. However, it can be easily countered with the Pounder Fusion Karakuri. The Gritdog is more susceptible to wind damage and weapon damage.
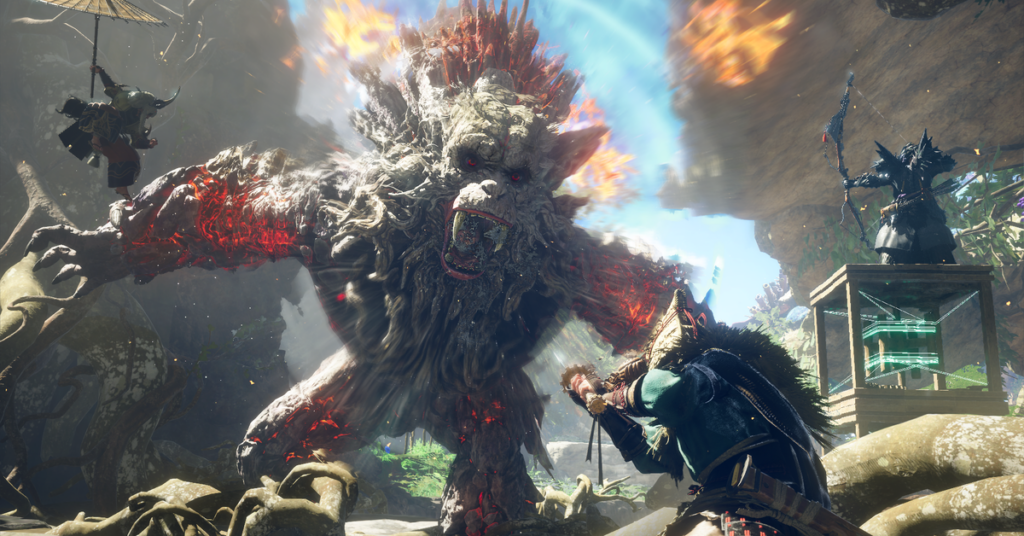
Lavaback
The most difficult Kemono chapter one Wild HeartsThe Lavaback has strong attack power and maneuverability that will take down the best of hunters. Impervious to fire, players will want to instead exploit its weakness to water and perhaps craft a water aligned weapon through one of the game’s various weapon trees if they find themselves stuck. Along with sleep disorders and poison, it’s most vulnerable to cutting and piercing. You won’t be able to create weapons with either of these effects yet, but it’s good to keep in mind for the future.
Earthbreaker
It is easy to defeat this Kemono, which has a gargantuan appearance. The fight is quick and easy if you follow all the instructions from the NPCs.
Chapter 2: How to beat the gigantic Kemono of Wild Hearts
:format(webp):no_upscale()/cdn.vox-cdn.com/uploads/chorus_asset/file/24440333/wild_hearts_fumebeek.png)
Image: Omega Force/Koei Tecmo/Electronic Arts via Polygon
After defeating the Earthbreaker, you’ll be able to fight another crop of giant Kemono. You’ll be able to fight the Deathstalker, the feared wolf that you met earlier in the game, and many other difficult monsters. Wild HeartsThis chapter increases difficulty considerably, so it is recommended to craft better weapons and armors. You’ll also be able to start crafting weapons that have the poison status ailment, which almost all Kemono are weak to.
Sporetail
This rodent, a variant of the Ragetail is capable of sleeping with just a few shakes of its huge body. It can summon waves of mice that will either run at you or serve as an add to your hunt. There isn’t any reason to fight the mice, and ignoring them is your best course of action. The Sporetail can also put you to bed, but it’s easy to stay awake by avoiding the plumes of dust that induce sleep. Similar to the Ragetail it’s weak to fire and vulnerable to blunt or slashing injury.
Fumebeak
The Fumebeak, one of the most deadly Kemono found in Chapter 2, is the first true aerial enemy that you’ll face in the game. You should bring foods that will help you ward off the poisonous Fumebeak. The Healing Mist Karakuri can be used to prevent poisoning. Additionally, this beast can be very fast and take out hunter when it is angry. Weapons with piercing attack will do the most damage. This is where weapons such as the Claw Blade are useful.
Goldshard
The Goldshard, which is weak to wind damage and elemental plant damage, is slow-moving enemy. However it has many well-telegraphed attack that makes this Kemono one of the easiest during chapter 2. It will not use ranged attacks that involve firing spines of crystal in your direction if you stay close to it. For the Goldshard to be defeated, you should use weapons that can inflict blunt and severe damage.
Icetusk
This giant Kemono, an ice version of Kingtusk has the same deadly charging attacks as its grass counterpart. While it can take blunt and piercing damage but is vulnerable to fire attack, the Kemono’s ice counterpart is much stronger. The Torch Karakuri can help you defeat this huge boar.
Cobalt Lavaback
Cobalt Lavaback (or Cobalt Lavaback) is an improved version of the original Lavaback. It retains the same moveset, but it has weaknesses. It does more damage. If you’re struggling with this enemy, make sure to eat food. Cobalt Lavabacks are susceptible to severe piercing injuries and weak to poison and other sleep-related ailments.
Ripclaw
The Ripclaw is similar to the Dreadclaw in terms of its weaknesses and moves. The Sporetail is comparable to the Ripclaw in that it can use a variety of its attacks to put hunters to bed. You can either stand by it or use Harpoon Karakuri to eliminate this Kemono. This Kemono can’t withstand Fire attacks so it needs to be protected with the Torch Karakuri, as well as Slashing damage.
Deathstalker
The Deathstalker is one of the most difficult Kemono, and can jump across an arena at incredible speeds. The Deathstalker is also capable of creating walls that it can launch itself from, so you will be kept on your toes till you have memorized its moves. The Deathstalker will be severely damaged if it uses the Torch Karakuri, which makes its shoulders even more vulnerable after it has become enraged. Although it is most vulnerable to receiving piercing and poisoning damage, its strength is the weakest.
Chapter 3. How to beat the huge Kemono in Wild Hearts
You unlock the ability to fight “Mighty” Kemono after beating the Mighty Dreadclaw. These are just tougher versions of Kemono you’ve fought before, which means you can largely use the same strategies to defeat them. You will want to upgrade your weapons and armor at this point, though, if you haven’t already. Either branching into the Human or Kemono path on the skill tree will help give you that extra bit of defense you’ll need to get, or you could just farmn the next set of (identical) but stronger gear obtained from these Kemono.
Wild Hearts: Mighty Kemono Variants
- Mighty Ragetail
- A Mighty Place to Shop
- Mighty Sapscourge
- Mighty Kingtusk
- Mighty Spinegilder
- Mighty Dreadclaw
- Mighty Gritdog
- Mighty Goldshard
- Mighty Cobalt Lavaback
- Mighty Icetusk
- Mighty Lavaback
- Mighty Deathstalker
- Mighty Fumebeak, Chapter 4
The strategy against these “Mighty” versions is largely the same as the strategy you’d use against their normal counterparts. These Mighty Kemono do more damage. Their attack patterns and abilities are the same. As always, the best piece of advice is to upgrade your weapons, armor, and start eating the food you’ve been drying, fermenting, or pickling up to this point if you feel yourself struggling.
Prioritize the story until you can unlock the Harpoon Karakuri. You can use this Karakuri to temporarily hold Kemono in place while doing significant damage. It’s especially great for dealing with airborne Kemono, like the Fumebeak and Pearlbeak, but can be used effectively on any monster.
Pearlbeak
The Pearlbeak is similar to the Fumebeak and has deadly dive attacks as well as a powerful spin attack. This will put even the best hunter’s defenses under pressure. And while it doesn’t inflict status ailments, it will instead create bursts of water after its attacks. This means you can’t just sit through any of its attacks and let the poison meter build up in exchange for damage. To make the fight easier, unlock Harpoon Karakuri if you are having trouble with this particular variant. This weapon is very weak against earth elemental damage and can deal both blunt and piercing injuries.
Venomglider
The Spineglider can be poisonous to hunters in a variant called the Fumebeak. Thankfully, it’s relatively easy to deal with if you use the same strategy as you did with the Spineglider. The Pounder Karakuri can be used liberally to get this flying squirrel down in no time.
:format(webp):no_upscale()/cdn.vox-cdn.com/uploads/chorus_asset/file/24440271/wild_hearts_Emberplume_01.png)
Image: Omega Force/Koei Tecmo/Electronic Arts via Polygon
Chapter 4: How to defeat the gigantic Kemono of Wild Hearts
Chapter four, “Nature Stagnant,” also features a handful of more challenging Kemono for hunters. Like chapter three, you’ll want to invest in the best food items and armor you can craft. The Kemono will test your resolve and require you to do everything in your power to win. You’ll also want to utilize all of the tools at your disposal. This includes using your drying rack to create food ingredients that you can pickle in your fermentation barrel. These will help increase your health and reduce damage. It will help a lot to upgrade your armor, and make use of Human or Kemono passives.
Onyxshard
Onyxshard is a Goldshard variation. It has the same weakness and moves as Goldshard. Fighting this Kemono is fairly straightforward, and if you’ve been leveling up your armor and weapons, it will go down easily. But if you’re struggling, use the Harpoon Karakuri to hold it in place to attack its weak points.
Amaterasu
It can be found at Akikure Canyon after Amaterasu has been defeated in a story fight. You will need to keep it from moving and break any weak spots. It is best to stay away from the Harpoon Karakuri when it starts attacking, because its attacks can cause severe area-of-effect damage. To avoid being sucked into its attacks, it is best to be familiar with its movements and conserve your stamina. The Kemono is vulnerable to both wind elements and blunt and slashing weapon damage. Be sure to get the most defensive foods before you attempt this Kemono.
Emberplume
Although it is slower than the Amaterasu, Golden Tempest and the Emberplume, the Emberplume makes use of diving attacks to cause damage and huge explosions with purple flames that can be used to destroy hunters. Harpoon Karakuri, like the Amaterasu is the best way to win. Since the Emberplume has significantly longer windows for attacks, even when enraged, this is the first endgame Kemono you’ll want to take on — and potentially get weapon upgrade and armor from — before tackling the Golden Tempest. It is vulnerable to Earth elemental and piercing damage as well as slashing.
Golden Tempest
It can be extremely quick and hit from any distance. You can fire a projectile from the mouth or tail of this creature. It also has the ability draw or push out hunters through manipulations of wind. It can be hard to dodge attacks due to its size. So it’s best to conserve stamina to perform well-timed dodges or to use your arsenal of Karakuri to assist you in defeating this impressive feline. This Kemono is unable to take piercing or other damage. The frost disease will prevent it from getting out of control.
Get more information at Wild HeartsYou can read the beginners guide, explaining multiplayer, fast traveling, stamina and building camp.
#Wild #Hearts #giant #Kemono #monster #locations #strategies #weaknesses


