
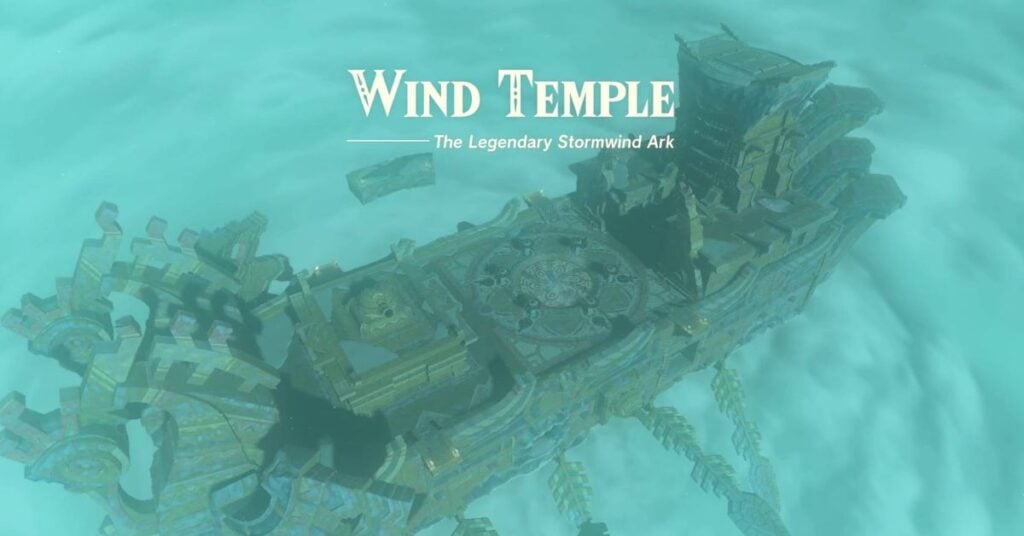
Wind Temple walkthrough in Zelda: Tears of the Kingdom
You’ll need to conquer the Wind TempleAfter reuniting Tulin with the Sky Islands and ascending them in Tears of the Kingdom: The Legend of ZeldaAs part of the Tulin Village quest.
You’ll be tasked with turning five (not four, like some of the other temples) of the gears to open the hatch on the ship. Tulin can help by providing the wind to make sure that the mechanism opens.
We will show you how to use the five locks and defeat its leader, Colgera. Although we have listed the five turbine locks below in numerical order, there is no need to follow this order.
Prepare for Wind Temple Dungeon
Make sure that you have the correct tools before you begin. Wood You can also find out more about the following: Flint on-hand, as you’ll need to melt large chunks of ice to get some optional loot.
It is also important to have Cold resistancePotions or armor, as it’ll be quite cold outside of the temple. (The indoor parts of the temple are not cold, so you don’t need to worry about staying cold resistant while you solve the indoor parts of the puzzle.)
Wind Temple – How to Get There
You’ll probably be here already if you’ve been following our walkthroughs, but you’ll get to the Wind Temple just by following the broken ruins that are part of Rising Chain Island. Tulin will help you easily glide from piece to piece until you get to the eye of the storm, which you’ll dive into.
First turbine lock activated
Use the wind to your advantage and glide northwards, landing at the top of the ship.
:format(webp):no_upscale()/cdn.vox-cdn.com/uploads/chorus_asset/file/24642837/vlcsnap_2023_05_08_13h18m04s047.png)
Image: Nintendo EPD/Nintendo via Polygon
You can use Ultrahand to open the doors and then drop into the structure, avoiding the lasers. Because there’s a huge fan at the bottom of this structure, you’ll need to carefully open and close your glider to dodge the lasers, while making sure not to take fall damage.
The room is divided into two levels. On the north ledge, you will find the wind turbine which Tulin must hit to turn the gears. The southern ledge contains a Soldier III Blade.
Return to the middle of the boat by riding the current.
The second turbine lock is activated
Two locked rooms are located to the north of the middle of the ship. The western room can be accessed by using Ultrahand. Remove the construction to reveal a chest containing an Opal.
The lever on the door is damaged. It is located to the east of this room. Then, using Ultrahand, fuse the nearby icicle with the broken lever.
:format(webp):no_upscale()/cdn.vox-cdn.com/uploads/chorus_asset/file/24642838/vlcsnap_2023_05_08_13h25m29s949.png)
Image: Nintendo EPD/Nintendo via Polygon
You can now access another turbine lock by opening the door with the newly-functional lever. Use Tulin’s gust on it and return to the central area.
Third turbine lock activation
You can jump off of the east side and glide down to platforms or trampoline boat around. You will need to avoid the cannon that is mounted along the side of ship.
Search for doors blocked by icicles. You can also use explosives such as bomb arrows or chuchu jelly to remove the icicles.
:format(webp):no_upscale()/cdn.vox-cdn.com/uploads/chorus_asset/file/24642839/vlcsnap_2023_05_08_13h34m12s481.png)
Image: Nintendo EPD/Nintendo via Polygon
Right away, you’ll see a chest locked away far behind some bars on your left. Ultrahand can be used to connect the icicles to the ceiling to make a long, flexible stick that you can use to grab and attach the chest. Take the chest and put it back into the slot to get a sapphire.
Take out the keese. You can reverse the wheel by using Recall. Fight the construct and use Ultrahand on the lever to open the door, but don’t leave the room yet.
You can attach an icicle on the wall to turning gears by using an arrow.
:format(webp):no_upscale()/cdn.vox-cdn.com/uploads/chorus_asset/file/24642840/vlcsnap_2023_05_08_13h38m54s663.png)
Image: Nintendo EPD/Nintendo via Polygon
You will be able to access the third turbine by opening the gate. Switch it on, and then head to the main part of the ship.
Extra chest locations
Jump up to Wind Temple 1F using the trampoline on the east of the ship, or by following the current. You can manually climb the stairs if desired.
:format(webp):no_upscale()/cdn.vox-cdn.com/uploads/chorus_asset/file/24647253/jlee_230510_1001_totk_wind_temple_2.jpg)
Image: Nintendo EPD/Nintendo via Polygon
Then, jump until the block of ice breaks. Create a fire by dropping wood, flint, and hitting the ice with metal weapons. Flip the lever with Ultrahand and you will get a zoneite shield.
:format(webp):no_upscale()/cdn.vox-cdn.com/uploads/chorus_asset/file/24642847/vlcsnap_2023_05_08_21h07m21s952.png)
Image: Nintendo EPD/Nintendo via Polygon
Run around 1F on the western side. To get 10 more arrows, build another campfire near this iceblock.
:format(webp):no_upscale()/cdn.vox-cdn.com/uploads/chorus_asset/file/24642848/vlcsnap_2023_05_08_21h07m57s306.png)
Image: Nintendo EPD/Nintendo via Polygon
The fourth turbine lock is activated
The hole you will be heading into is on the western side of your ship.
:format(webp):no_upscale()/cdn.vox-cdn.com/uploads/chorus_asset/file/24647713/link_glides_to_sky_ark.jpg)
Image: Nintendo EPD/Nintendo via Polygon
Jump and crouch to avoid lasers and defeat the construction on the right. You will get a chest containing a ruby.
After defeating both keese, turn back and proceed to the right. The campfire will melt the ice blocks, allowing you to obtain a Zonai capsule with time bomb and portable pot.
Use Tulin’s wind to jump across the icy gap and use Ultrahand on the lever to open the door outside on the right. Continue to venture further left and take out the construct with a long neck. Once it’s dead, Ascend up.
Pick up two of the stone slabs on the north side to find a Captain II reaper chest.
:format(webp):no_upscale()/cdn.vox-cdn.com/uploads/chorus_asset/file/24642850/vlcsnap_2023_05_08_21h08m41s326.png)
Image: Nintendo EPD/Nintendo via Polygon
Look to the south of this room for a missing windmill blade. The four stones on the floor can be manipulated to form a working windmill.
:format(webp):no_upscale()/cdn.vox-cdn.com/uploads/chorus_asset/file/24642844/vlcsnap_2023_05_08_14h18m04s541.png)
Image: Nintendo EPD/Nintendo via Polygon
Once it’s put together, use Tulin’s wind gust to open the gate and climb through.
Keep climbing up, take out the construct above, and use Tulin’s wind on the turbine lock. Head back to the main area once you’re done.
Active the fifth turbine locks
Under the ship, there is one last lock. Glide down from the east side, and you’ll notice a small platform with some lanterns to land on:
:format(webp):no_upscale()/cdn.vox-cdn.com/uploads/chorus_asset/file/24642851/vlcsnap_2023_05_08_21h09m17s410.png)
Image: Nintendo EPD/Nintendo via Polygon
Tulin will activate your turbine and you can then head up.
Colgera The Wind Temple boss – How to Beat him
Make sure to have plenty of ammunition before you begin this battle. ArrowsWe recommend having a dozen or more on hand. Also, we recommend that you have at least a dozen of these on hand. Aerocuda wingsAs they will be of great assistance throughout your fight. Have enough Cold resistanceIt will be cold during your entire fight. You’ll also want to (as usual) make sure you have Food to Restore Your HealthIf things begin to go wrong.
You’ll spend all of this boss fight in the air, firing arrows, which is why we recommend you have a ton. Luckily, as you draw your bow, time will slow down, allowing you to take accurate shots — while your stamina drains. When you stop gliding, you’ll regain large amounts of stamina at a time, so you can stay in the air throughout the whole fight.
Once you’re ready to take on the boss, interact with the altar at the center of the ship.
:format(webp):no_upscale()/cdn.vox-cdn.com/uploads/chorus_asset/file/24642853/vlcsnap_2023_05_08_21h09m54s781.png)
Image: Nintendo EPD/Nintendo via Polygon
Colgera has several ice plates on its underside, which you’ll want to break open with arrows. Once they’re broken open, you can hit its weak point under the ice. By adding aerocuda wing tips to your arrows, they will fly more accurately and allow you to target the weak point under the ice.
Colgera is a flying creature that will enter and exit portals. It will cause damage to you if it hits you. Make sure you pan the camera in all directions to find out where it might be coming from. Tulin will also shout things like, “Below you!” to help out.
After a bit, Colgera will fire the spikes on its top side, so you’ll have to glide and dodge them. You can use Tulin’s wind gust to help you dodge these spikes. After the spikes have been applied, you can use more arrows to break ice on its top.
:format(webp):no_upscale()/cdn.vox-cdn.com/uploads/chorus_asset/file/24642856/vlcsnap_2023_05_08_21h10m06s510.png)
Image: Nintendo EPD/Nintendo via Polygon
Colgera disappears and reappears in its second phase after you have destroyed all three segments. The second phase is largely the same, but Colgera will now summon annoying tornados that you’ll need to avoid.
Once again, fire at the ice on Colgera’s underbelly to expose its weak points, and then hit the weak points. We were able, using an arrow and aerocuda wings in combination with a bow that had 14 damage points, to successfully break the ice. If you’re quick with your aim, you can fire off two consecutive shots to break the ice and then immediately hit the weak point.
Repeat this for each of Colgera’s segments and it’ll be defeated in no time.
Grab the Heart Container when it lands on your screen, interact with an altar, and then watch the cutscene.
You’ll now be able to use Tulin’s abilities around the map wherever you are, giving you a nice horizontal boost when gliding. You can now freely move around the Hebra mountain range without being hindered by the snowstorm.
When ready, it’s time to continue the Regional Phenomena quest — assuming you have other locations yet to complete.
#Wind #Temple #walkthrough #Zelda #Tears #Kingdom


