
Atomic Heart guide: Where to find all Testing Grounds in Polygons
Atomic Heart’s Testing Grounds are optional dungeons that are totally worth the effort of tracking down. Polygons are also known as Polygons. Each Polygon you locate gives you more blueprints for weapon attachments. Once you’ve obtained the Facility 3826 map, you’ll be able to freely visit and explore these underground bunkers.
Here’s an overview of every Polygon Testing Ground location in Atomic HeartThese instructions include detailed information on unlocking them.
How to Unlock Testing Grounds In Atomic Heart
:format(webp):no_upscale()/cdn.vox-cdn.com/uploads/chorus_asset/file/24459517/How_to.jpg)
Image by Mundfish/Focus Entertainment via Polygon
The steps to unlock any Polygon location are the same regardless of the Polygon type.
- Begin by approaching the Area marked yellow as shown on your map, indicating the Polygon’s approximate location.
- Find a local business to do the next step. TerminalA small, white mechanism that can be accessed from the side (see left side of above image) is used to access all cameras in the vicinity. Attention: The terminal might be located outside the yellow zone!
- When operating the terminal you will need to find a camera that’s aimed at the Polygon’s doorTo open the door, press and hold on the interaction button.
- Next, we need to Find the entryThe Polygon. Of course, as you’ve already seen the doorway through the cameras, try to go in that direction.
Every Testing Ground includes a bronze or silver-colored test ground. With blueprints, chest. They’ve got a very distinctive look, as shown in the picture above on the right. Work your way through the puzzles and enemies, and you can’t really miss them.
All Atomic Heart Polygon Testing Grounds Locations
These steps will teach you how to hunt for Polygons. Atomic Heart, it’s still quite difficult to find every terminal, open the correct cameras, and locate the entranceways by yourself. If you don’t want to spend a lot of time searching the area, here’s exactly where to find every Testing Ground, and exactly what you’ll need to do to unlock it. There are not Polygon Testing Grounds available for numbers 3 through 5.
Polygon Testing Ground 1 Location
:format(webp):no_upscale()/cdn.vox-cdn.com/uploads/chorus_asset/file/24459518/Polygon_1.jpg)
Image by Mundfish/Focus Entertainment via Polygon
When approaching Polygon 1 (from the east), look out for an Large white platformA spiral staircase. You can find the following: TerminalIt is located on the top of this platform. As shown in the image, use the camera to take the photograph. Next, look inside for the entrance for Polygon 1. Small blue building. The blue building is very close to the white platform you’re standing on.
Inside Polygon 1, you’ll find the following loot:
- Fox: Ergonomic Handle (Bronze)
- MP: Expansive Converter (Silver)
- Extended Magazine (Gold), K-23
- Zvezdochka: Reverse Shot (Gold)
Polygon Testing Ground 2, location
:format(webp):no_upscale()/cdn.vox-cdn.com/uploads/chorus_asset/file/24459519/Polygon_2.jpg)
Image by Mundfish/Focus Entertainment via Polygon
It TerminalIt is at the top of the Platform in whiteWith the spiral stairs south of yellow. This is the lift that takes you to Polygon 2 entry. The small, blue building is inside.Between the Terminal building and the huge Plant 01 building to the east, is.
The following loot can be found in Polygon 2.
- MP: Electromagnetic polarizer (Bronze).
- KS-23: Expansive Converter (Silver)
- Kalash Thermal Imager (Gold).
- Snowball: The Polymeric Alloy Aerodynamic Addment (Gold).
Polygon Testing Ground 6 Location
:format(webp):no_upscale()/cdn.vox-cdn.com/uploads/chorus_asset/file/24459532/Polygon_6.jpg)
Image by Mundfish/Focus Entertainment via Polygon
Take the elevator up to unlock Polygon 6. The top of the towerCross the lake, and then use the Terminal. Heads up: There’s a similar tower closer to the Testing Ground location, but that’s not the correct one! You can see the Polygon 6 entrance from the tower; it’s inside a tunnelThe boathouse is south.
The following loot is available in Polygon 6:
- MP: Extended Magazine (Bronze).
- Kalash: Kalash Collimator (Silver).
- Electromagnetic Emitter Gold (Electro: Electromagnetic Emitter)
- Snowball: The Battering Blow (Gold).
Polygon Testing Ground 8.
:format(webp):no_upscale()/cdn.vox-cdn.com/uploads/chorus_asset/file/24459535/Polygon_8.jpg)
Image by Mundfish/Focus Entertainment via Polygon
Carefully approach the grey building, as it’s surrounded by enemies. To reach the top, you will need to climb up. The highest point of the roofTo find the Terminal. You will need to Three cameras are activatedTo access the Polygon. The one in the south is a bit tricky; you’ll have to look to the right and then down in order to see the interaction button.
You can find the elevator that leads to Polygon 8. Inside the building. You will find the elevator to your right when you enter the main entrance on the south-east side. The following blueprints are contained in Polygon 8.
- Zvezdochka: Lower Blade (Bronze)
- Fox: Titanium blade (Silver), lightweight and lightweight
- Dominator: Vortex Transducer (Silver)
- MP: Revolver-type Bolt Frame (Gold)
- Swede Polymeric Alloy Extension, Gold
Polygon Testing Ground 9
:format(webp):no_upscale()/cdn.vox-cdn.com/uploads/chorus_asset/file/24459538/Polygon_9.jpg)
Image by Mundfish/Focus Entertainment via Polygon
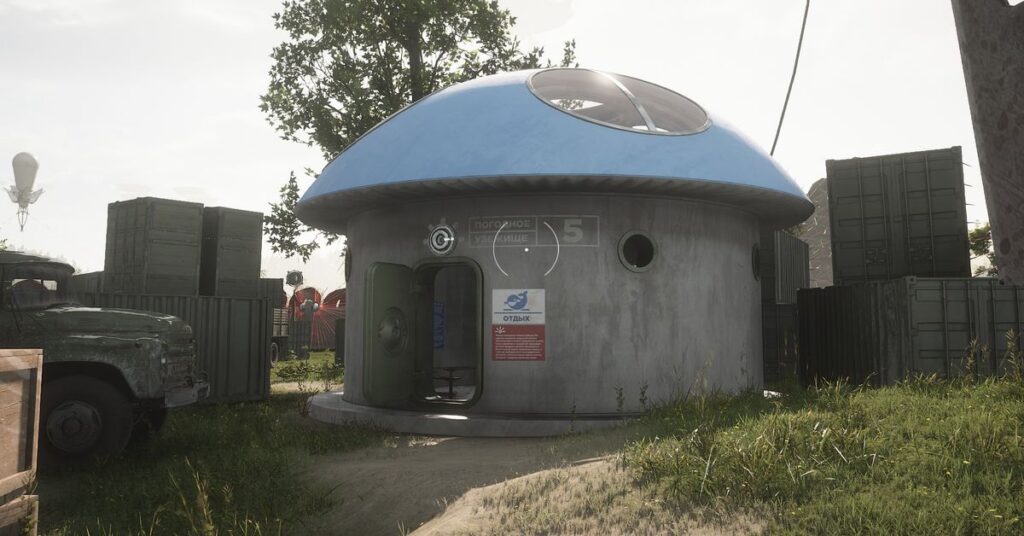
The Polygon Testing Ground is quite tricky. The Polygon Testing Ground is a tricky one. Terminal is quite easy to find — it’s on top of the blue house in the northeastern part of town — you first need to Reactivate the cameras. To do so, drop down a tunnelAs shown in this picture, it is in the south part of the town. Be careful, as it’s riddled with monsters down there.
Once you’re inside the tunnel, keep following the path until you reach a room with Four boilersThere is a door puzzle at your right. Find the solution to the door puzzle and grab the Orbs glowing orangePlace them in the tube with the transparent material and then guide them towards the boilers. Repeat this process for each boiler until they explode. Follow the polymer path outside. Once you have reached the end of the room, go up to the blue house and activate the camera.
Just outside the small shack is Polygon 9’s elevator. The large statue is hidden behind it.. The following loot can be found inside:
- KS-23: Collimator (Bronze)
- Dominator: Impulse Divider (Silver)
- Kalash: Electromagnetic Polarizer, Gold
- Pashtet: Ergonomic Handle (Gold)
Polygon Testing Ground 10,
:format(webp):no_upscale()/cdn.vox-cdn.com/uploads/chorus_asset/file/24459544/Polygon_10.jpg)
Image by Mundfish/Focus Entertainment via Polygon
You can find the terminal required to unlock Polygon 10 on the The top floor is a wooden home. To reach the Polygon, climb up to the drainage. To get to the Polygon, take an elevator. right next doorIn the smaller building.
You’ll find the following blueprints inside Polygon 10:
- Kalash: Extended magazine (Bronze).
- MP: Collimator Silver
- Fat Boy: Trap Mine, Gold
- Dominator: High Intensity Modulators in Gold
Polygon Testing Ground 11
:format(webp):no_upscale()/cdn.vox-cdn.com/uploads/chorus_asset/file/24459548/Polygon_11.jpg)
Image by Mundfish/Focus Entertainment via Polygon
You will find the terminal required to open Polygon 11 in a High towerYou can go much farther north than the yellow zone. Once you have used the camera, move south and follow the path to the grey building on the right side. Click to interact with the camera. HAWK maintenance. One of these will result in the Surveillance machines flyingRight in front of the grey building, you can get down. Take this machine and, once it has risen again, you can use it. ZiplineTo get down.
:format(webp):no_upscale()/cdn.vox-cdn.com/uploads/chorus_asset/file/24459546/Polygon_11_Cabin_Key_Disk.jpg)
Image by Mundfish/Focus Entertainment via Polygon
Now you are in a secure area with small gates. wooden cabinYou will find the South Side (see image above). Take the keys to the cabin. Key DiskYou can lie on the floor next to the corpse. By climbing on top of the fence, you can get out of this region.
With the Key Disk in your pocket, you’ve got everything you need to unlock Polygon Testing Ground 11. Follow the coast south until you reach the “Key Disk”. Little blue buildingWith the elevator. Solve the puzzle on the door, insert the Key Disk, and you’re free to start the hunt for the Polygon 11 loot:
- Kalash: Expansive Converter (Bronze)
- MP: Thermal Imager (Silver).
- KS 23: Damper Polymeric Stock (Gold).
- Fat Boy: Homing Projectiles (Gold)
#Atomic #Heart #guide #find #Testing #Grounds #Polygons


